How to Take Video Calls Using a Smart TV
Amber Stefanson | Feb 23, 2023
Televisions are a highly versatile and underrated tool for taking video calls. Have you ever huddled with your whole household around one tiny laptop screen to join a family Zoom call?

(Photo by KoolShooters on Pexels)
If this scene looks familiar, let me tell you: there’s an easier way. The TV in your living room can display the call for the whole family so that everyone can see it from an ideal viewing angle, and with an external webcam, everyone can be seen on camera from the comfort of the couch.
Living rooms are also ideal meeting places for remote workers, since each of your colleagues gets more screen space due to the larger size of a TV. Not to mention, the increased viewing distance of a TV compared to a laptop is less likely to cause Zoom Fatigue, as one of the leading causes of Zoom Fatigue is the feeling of your colleagues invading your personal space.
And while TVs have been a staple in office presentations for years, recent working trends have required new solutions for hybrid working environments. With the right setup, a good TV can seriously simplify the A/V of your hybrid conference room.

(Photo by Damir Kopezhanov on Unsplash)
The latest generation of smart TVs feature built-in video calling apps, which make it much simpler to display video calls on your TV. With one of these devices, you no longer have to figure out how to position your laptop so that someone can mute the microphone as needed without preventing the HDMI cable from reaching the TV.
In this article, I’ll walk you through every aspect of setting up your smart TV to take video calls, and I’ll suggest some alternate options if your TV doesn’t natively support any video calling apps.
What You Can Expect to Learn
- Whether your TV is compatible with video calling apps
- How to cast video calls to your TV
- Whether your TV is compatible with USB or HDMI webcams
- How to choose a webcam to use with your TV
- Which webcam is best for video calls on TV
Video calling apps for TV
The first step towards making video calls using your TV is making sure that it natively supports your preferred video calling app. Currently, only Zoom and Google Duo have TV-compatible versions of their apps, and those apps are only available on select devices. Let’s go over a few of the TVs that support these apps and how to determine if yours is one of them.
Connect Zoom to Smart TV
Zoom has become a household name thanks to the spike in remote work and online learning, so it’s no surprise that they were one of the first video calling platforms to develop a TV-compatible app. Although the Zoom app will appear in most smart TV app stores, it’s only available to download on select models, such as the Fire TV Omni and the LG UH5E Series.
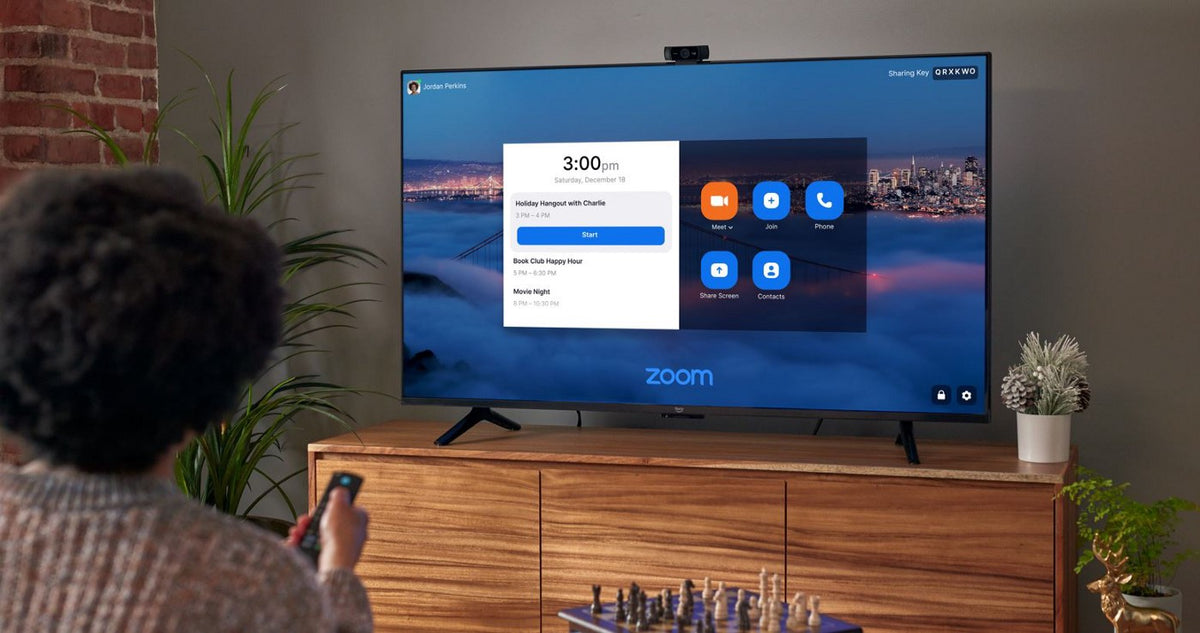
(Photo by Amazon Fire TV on Medium)
If you don’t have one of these TV models, check the download page for the Zoom app anyway. You never know — your TV might have been recently added to the list of compatible devices.
Connect Google Meet to Smart TV
Google Meet (formerly known as Google Duo) also offers a TV-ready app, which is compatible with Samsung QLED TVs from 2021 or later, Google TVs by TCL, as well as all TVs that use AndroidTV 8.0 Oreo or later.
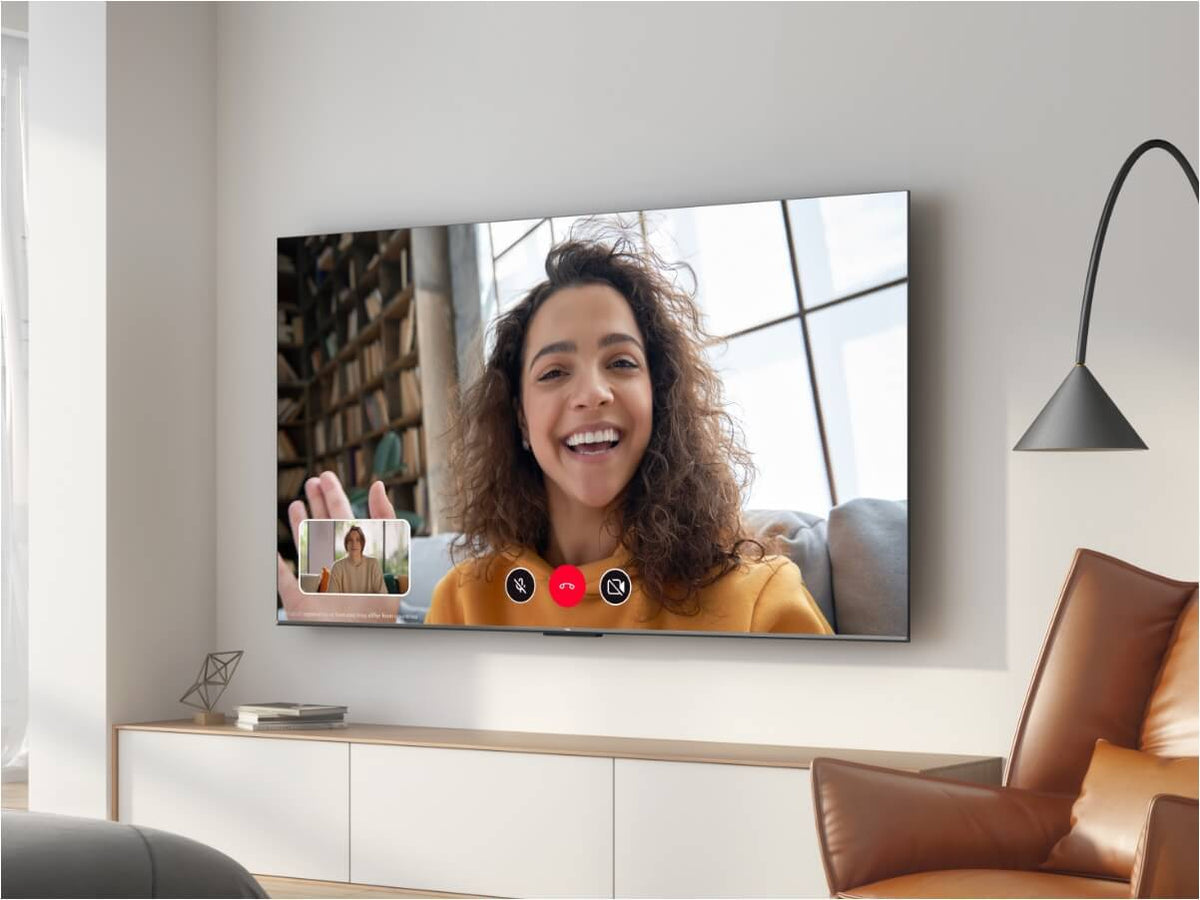
(Photo by TCL at TCL Global)
Google is always expanding their list of supported TVs, so be sure to check the app store to see if your TV is eligible to download the Google Meet video calling app.
Connect Video Calling Web Apps to Android TV
If your TV doesn’t support either of these apps natively, you may still be able to access your favorite video calling web apps from your web browser. Zoom, Google Meet, Microsoft Teams, and Cisco WebEx all support joining meetings directly from the browser… as long as your TV has the latest version of Google Chrome, Mozilla Firefox, or Microsoft Edge. If you have a compatible browser, simply type your meeting invite link into the browsing field to take your meetings from the big screen.


These supported browsers can be downloaded from the Play Store on any Android TV. However, their presence on other TV OS is limited. Browsers like Amazon Silk, Puffin, and those made by TV manufacturers, such as LG Smart TV Browser, are not supported by any video calling web apps.
Casting video calls to your TV
If your TV doesn’t support any video calling apps or compatible web browsers, you can still wirelessly cast your meeting, or you can use an HDMI cable to connect your TV as a secondary display.
You should also keep in mind that whichever device you use to cast your meeting onto your TV needs to be compatible with a webcam, and it needs to be close enough to the TV that you can comfortably mount your webcam. Most likely, the right device for the job will be a laptop or a desktop that is situated near your TV. However, you should also be able to cast your video calls from any Android tablet with a USB-A port that you can use to connect a webcam.
If you’re unsure how to cast to your TV, read on to discover where you can access this feature on your devices.
Screen Mirroring
There are many ways that you can cast wirelessly, from auxiliary streaming devices like Chromecast and television operating systems like Fire TV, to built-in compatibility with wireless mirroring tech like Airplay 2. However, each brand has different compatibility requirements for casting, so you’ll need to look into whether your computer is compatible with your TV setup.
How to Cast to Popular Streaming Devices
Apple TV
You can cast to Apple TV and Airplay-enabled TVs from any macOS device using Screen Mirroring.
Chromecast
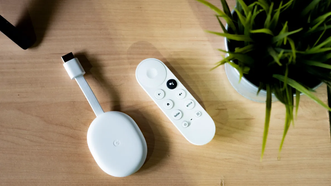
You can cast to a Chromecast device from Chrome web browser, regardless of which device you’re using.
Roku
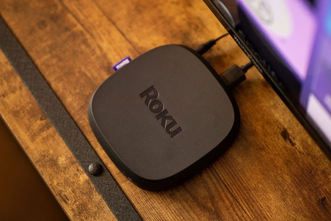
You can cast to newer Roku devices using Screen Mirroring on macOS or Bluetooth on Windows computers and Android devices.
Screen Mirroring
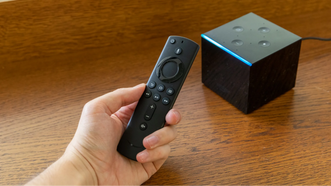
You can cast to Fire TV Devices using Screen Mirroring on macOS or Bluetooth on Windows computers and Android devices.
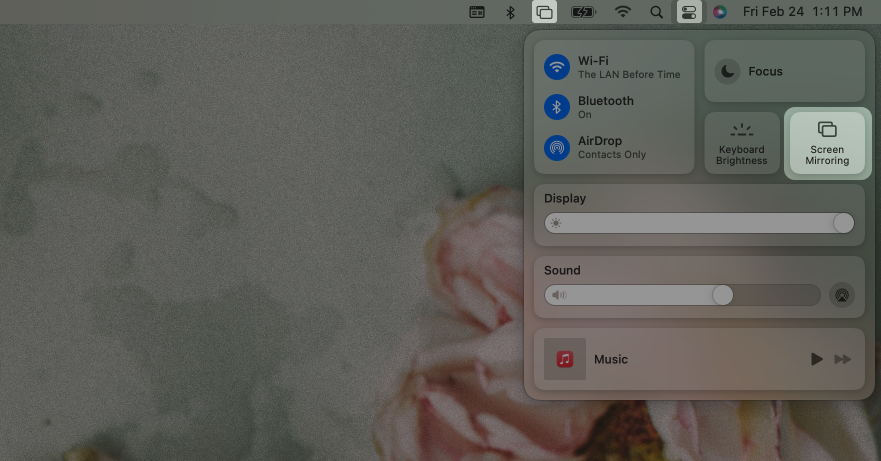
Where to find Screen Mirroring on macOS
To access Screen Mirroring on macOS, look for the overlapping screens icon in your navigation bar. You may be able to find it directly on the navigation bar, or it may be under the Control Panel, which is marked by the icon with the alternating sliders.
Where to find the Chromecast function
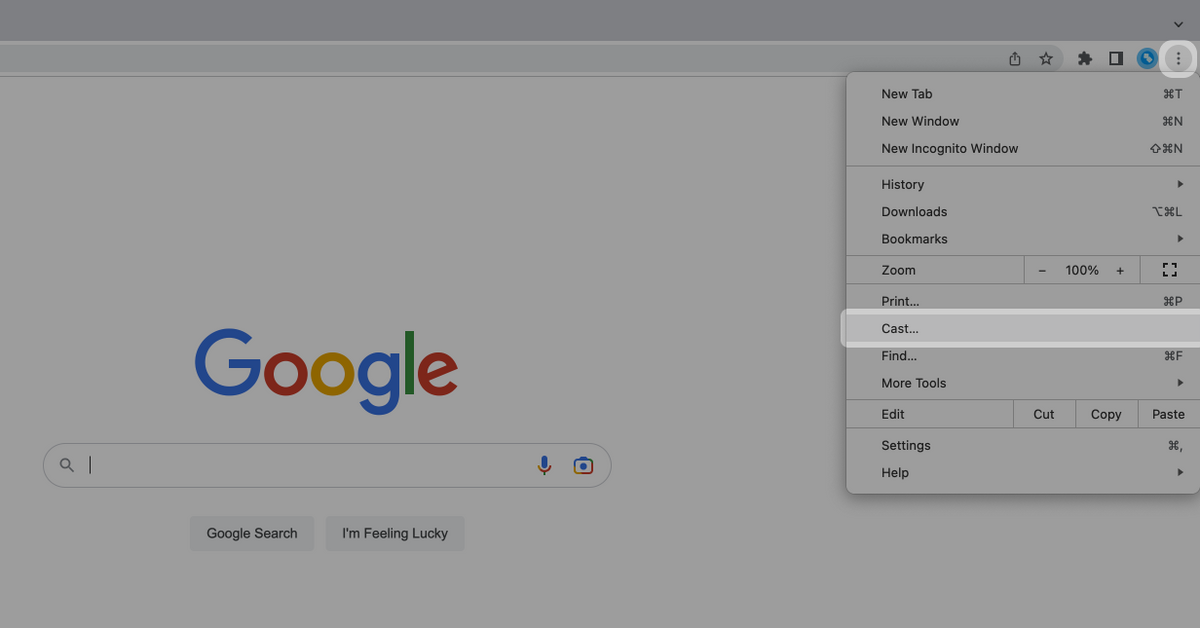
To access Chromecast, open your Google Chrome browser and open the customization menu by clicking on the three-dot menu icon in the navigation bar. Select ‘Cast…’ from the flyout menu and select your TV from the Cast Tab popup.
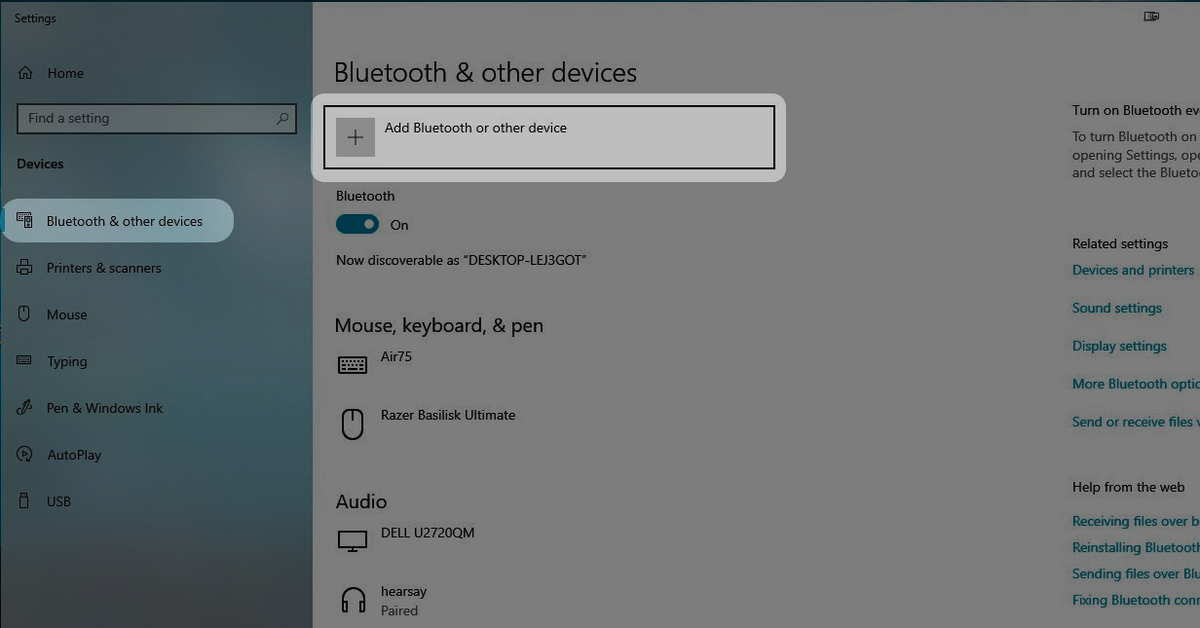
How to add a TV as a Bluetooth device on Windows
To access Bluetooth on Windows, open the Settings and select ‘Devices’. Under ‘Bluetooth & other devices’, click on ‘Add Bluetooth or other device’ and select ‘Wireless display or dock’ from the popup menu to add your TV to your list of devices. You may need to enter the settings of your TV, Roku, or Fire TV Stick to make your TV discoverable for the pairing process.
Connect via HDMI
If your computer doesn’t support wireless casting to your TV, you have one final option: connect them via HDMI. It may be an old school method compared to every other connectivity option we’ve covered here, but it’s also more reliable and less prone to lag than casting wirelessly.
If you’re looking to create a permanent setup, check out this article about planning a hybrid conference room. If you’re creating a temporary setup, the most convenient external camera to use will be one like the N970P — it features adjustable zoom so that you can use the same webcam in multiple locations and a remote control so that you’ll be able to control your meeting from a distance.
Hooking up webcam to smart TV
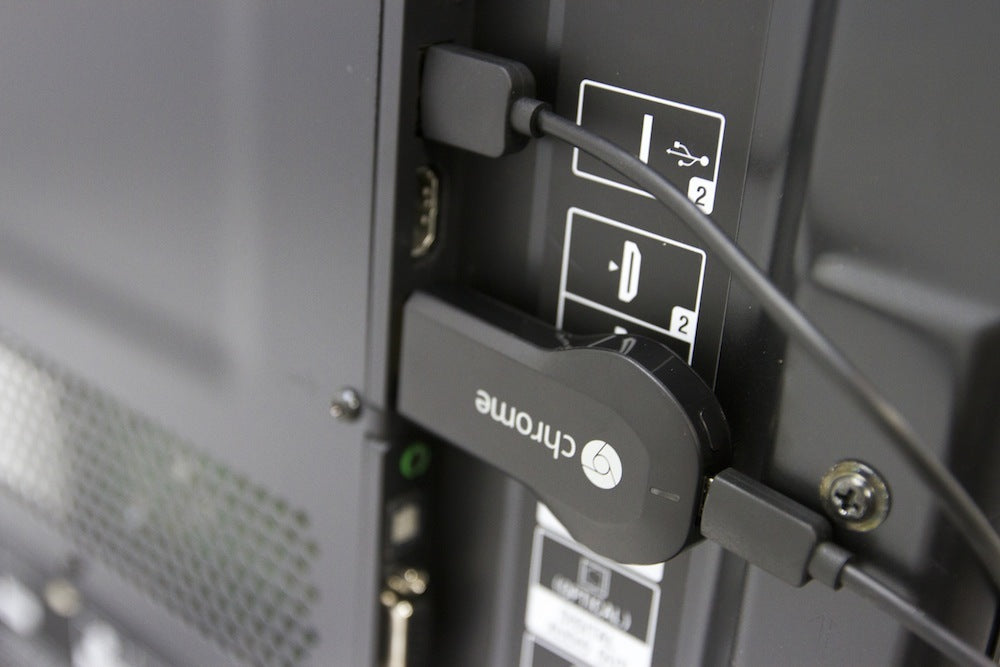
Now that your TV is set up to take video calls, you’ll need to connect a camera to your TV. First, check to see what ports your TV has. Most webcams use a USB-A port, so you will have a wider variety of cameras to choose from if your TV has a USB-A accessory port. If you don’t have a USB-A port on your TV, you’ll need a free HDMI port as well as an HDMI webcam or a USB webcam and a capture card.
Mounting your webcam
Next, you’ll need to mount your webcam. Many webcams have a clip-on mount that’s meant to rest on the top of your screen. However, you can achieve a more flattering camera angle if you mount your webcam closer to eye level. If you have a console below your TV, tabletop placement is ideal. Otherwise, you can mount your camera on a standard ¼” tripod, given that the webcam mount has a tripod thread built-in.
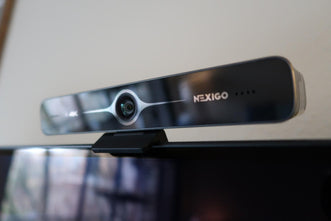
On top of the TV screen
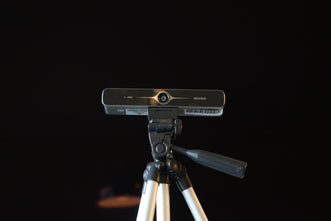
On a tripod in front the TV
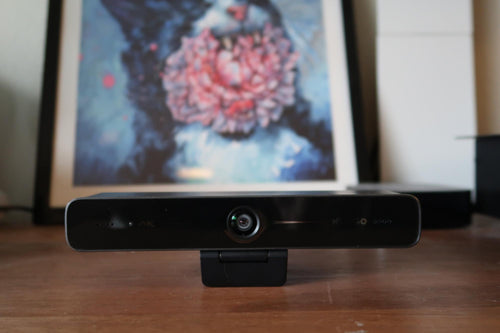
On a tabletop in front of the TV
Connecting your webcam to your TV
When your webcam is properly mounted, follow these steps to connect it to your smart TV:
- Plug your webcam into an open USB-A or HDMI port on your TV.
- Cycle through input sources until you see the camera feed to ensure that it’s connected to your TV.
- Open your video calling app to a test call. If your webcam feed does not automatically come up, you will need to enter the settings of the video calling app to select your webcam as the camera source.
Things to look for when choosing a webcam
Not every webcam will work well with your TV. This is because most webcams are designed for computers, while taking video calls from the TV requires unique qualities that you wouldn’t think to look for in a webcam for your PC. To improve your experience when taking video calls on your TV, keep an eye out for webcams with remote controls, small or adjustable FOVs, long or interchangeable cables, and versatile mounts.

(Photo by Christian Velitchkov on Unsplash)
These webcam features aren’t the most sought-after, and so webcam merchants are not always transparent about which of these features are included with each webcam. At NexiGo, we strive to provide you with all the information you need to make an informed decision. If you’re looking for a place to start, I recommend checking out our Webcam Comparison Table for a quick breakdown of all the specs for every NexiGo webcam.
Remote Control
Remote controls are a staple of the TV-viewing experience. If your webcam doesn’t come with a remote, you’re likely going to end up using your TV remote to control your meetings. However, your TV remote isn’t designed with video calls in mind, so it won’t have all of the buttons you need to be able to mute your microphone or turn off your camera. Webcams with remotes always have buttons to toggle audio and video, and they also often have built-in menus to adjust lighting and color.
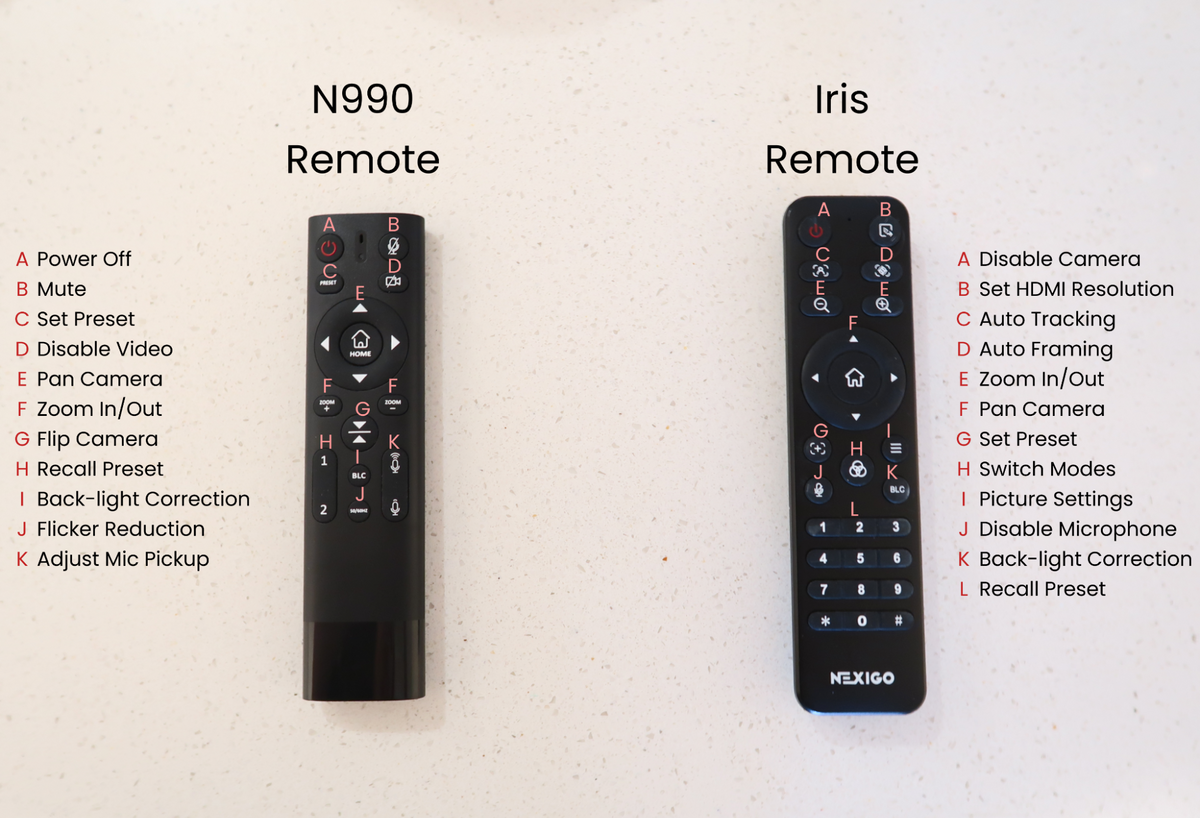
This is especially important because you can’t download software onto your TV to change lighting and color settings. Remote controls also benefit those casting from a laptop, since it’s inconvenient to get up or search for a tiny cursor on a huge screen in order to make these sorts of adjustments.
Small or Adjustable FOV
If your webcam is on or near your TV, it’s likely several feet away from where you’re sitting. From this distance, you might look too far away for others in your video call to see you properly. You might also feel that too much of your room is visible. One way to remedy this issue is to look for a webcam with a narrow FOV, which will produce a video with a more cropped appearance than a webcam with a wider FOV.
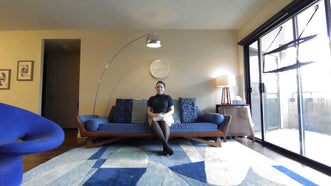
Taken from a webcam with a wide FOV
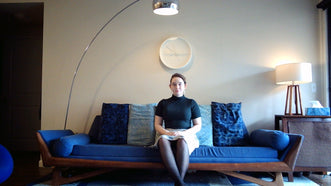
Taken from a webcam with a narrow FOV
Although webcams with wider FOVs are the best choice for office and streaming settings, in the living room, a smaller FOV is better because they enable you to remain fully visible despite being farther away from the camera. Adjustable FOVs offer the best of both worlds, since you can reframe your video feed based on qualities like how intimate you want your call to be, how tidy your space is, and how many people need to be in frame.
Although webcams with adjustable FOVs are ideal because they provide more flexibility, they can be expensive. If you’re on a budget, finding the right FOV for your space should be your priority.
To help you find the ideal field-of-view for your living room, I’m providing some reference photos of my living room as seen from three webcams with different fields of view. The dimensions of my living room are 10ft x 10ft, not counting the area past the archway to my left.
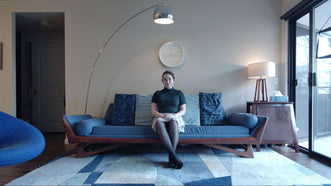
Taken with the N970P (0% zoom; 90º FOV)
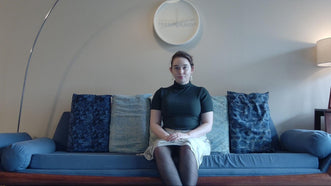
Taken with the N970P (10% zoom; 60° FOV)
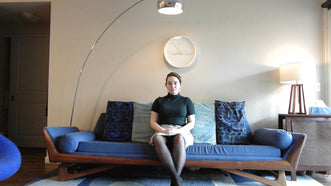
Taken with the N680P (80° FOV)

Taken with the N930AF (74º FOV)
Long or Interchangeable Cable
Most webcams are designed with shorter, 4-foot cables to accommodate laptops and average-sized desktop setups. However, a TV setup will likely require a longer cable, especially if you like to keep your cables out of sight.
Since most webcams come with attached cables, it’s important to pay attention to cable length when you buy a webcam for your TV. You need at least 6 feet to comfortably mount your webcam, and perhaps 8-10 feet to properly hide the cable if you mount it somewhere other than directly on top of your TV.
Some webcams, such as the NexiGo Iris and N970P, have interchangeable cables, so if their included cables aren’t long enough (which is unlikely at 9.8 feet in length) you have the option to swap it out for a longer one.
Alternatively, if you find the perfect webcam, but the cable is too short for your needs, you can extend it using a powered extension cable.
The Right Webcam Mount
One last thing to look for in a webcam is a stand that’s compatible with how you prefer to mount your camera. Most webcams have clip-on mounts that rest on the top of your screen.
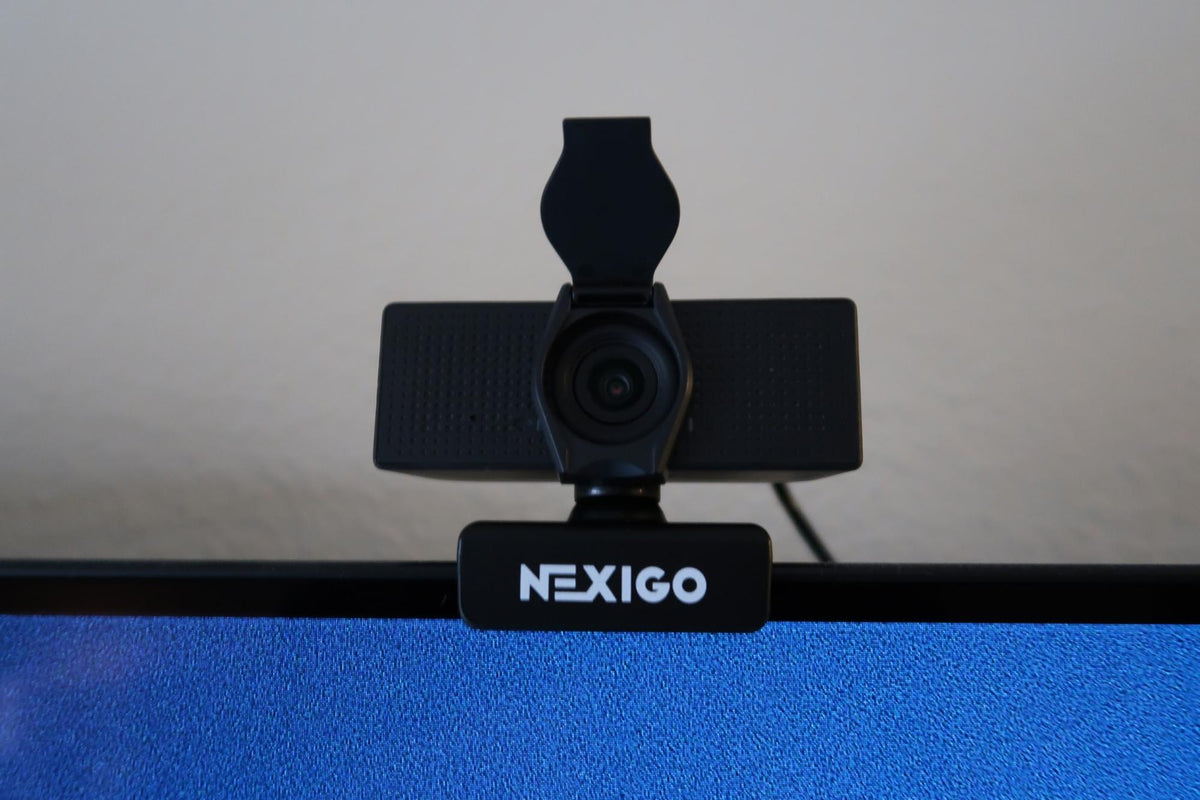
While this is ideal for many older displays, the TVs that support video calling are more likely to feature razor-thin bezels. A clip-on mount like the one above might cover part of the screen and use that area as an anchor point to support the weight of the webcam. Note how the webcam in the photo above covers a portion of the screen past the bezel. Over time, this has the potential to cause permanent damage to your screen.
Instead, it’s best to seek out webcams with tripod threads, tabletop mounts, or clip-on mounts that don’t come down very far on the front. It's also helpful to find webcams that are attached to their mounting clips by a single hinge or joint, as they will be able to pivot their anchoring point to the top edge of the TV, instead of on the screen.
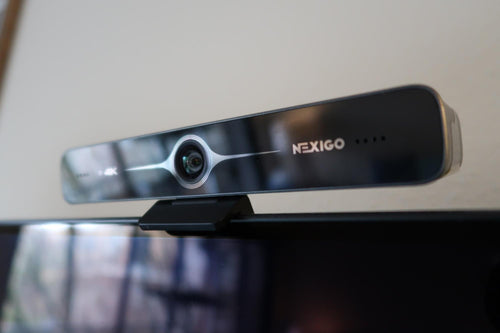
The N970P has a mounting clip that can rest on the top edge of the TV
4 Types of Webcam Mounts
Two-Axis Clips
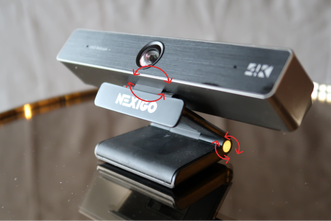
This type of mount enables the webcam to swivel side-to-side.
For this level of adjustability, look for webcams that connect to their mounting clip via a small hinge that looks like a neck.
Side note: the webcam pictured above has one of the thinnest clips, making it less likely to run past the bezel of your TV screen.
Three-Axis Clips
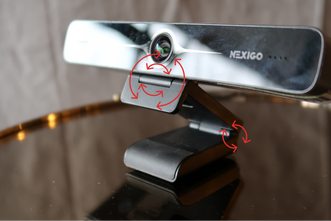
This type of mount enables the webcam to swivel forward/backward and side-to-side.
For this level of adjustability, look for webcams that connect to their mounting clips via a central, rounded hinge or a neck-shaped hinge that connects to a ball-shaped joint. However, a ball-shaped joint will have less range of motion than a central hinge.
Four-Axis Clips
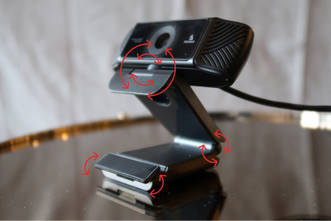
This type of mount enables the webcam to swivel forward/backward and side-to-side.
It also has an adjustable foot that can be used to prop up the webcam at different angles. This is especially helpful for balancing the webcam on top of a thin TV screen.
Clips With Tripod Threads
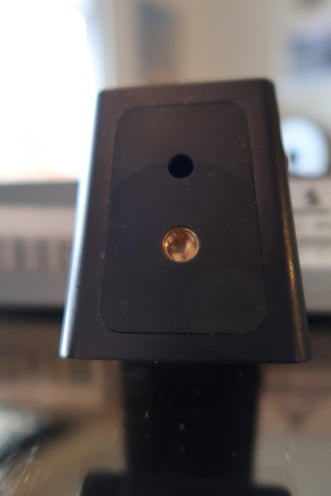
All NexiGo webcams also feature a ¼” tripod thread on the bottom.
Keep an eye out for this feature if you want a wider variety of mounting options.
However, the best place to mount your webcam is at eye-level, as this angle is more flattering and makes it easier to simulate eye contact. If the top of your TV is roughly level with your eyes, that position is perfectly fine. Otherwise, try to keep an eye out for webcams with tabletop mounts or ¼” tripod threads.
Best webcams for connecting to TV
With these four vital qualities in mind, here are a few of my top picks for webcams to use with your smart TV.
Best USB Webcams for TV
We offer a huge variety of USB webcams. Whether you’re looking to equip your hybrid office or your family room, I’m confident that we have the perfect webcam for your TV.
Best Overall: NexiGo N970P
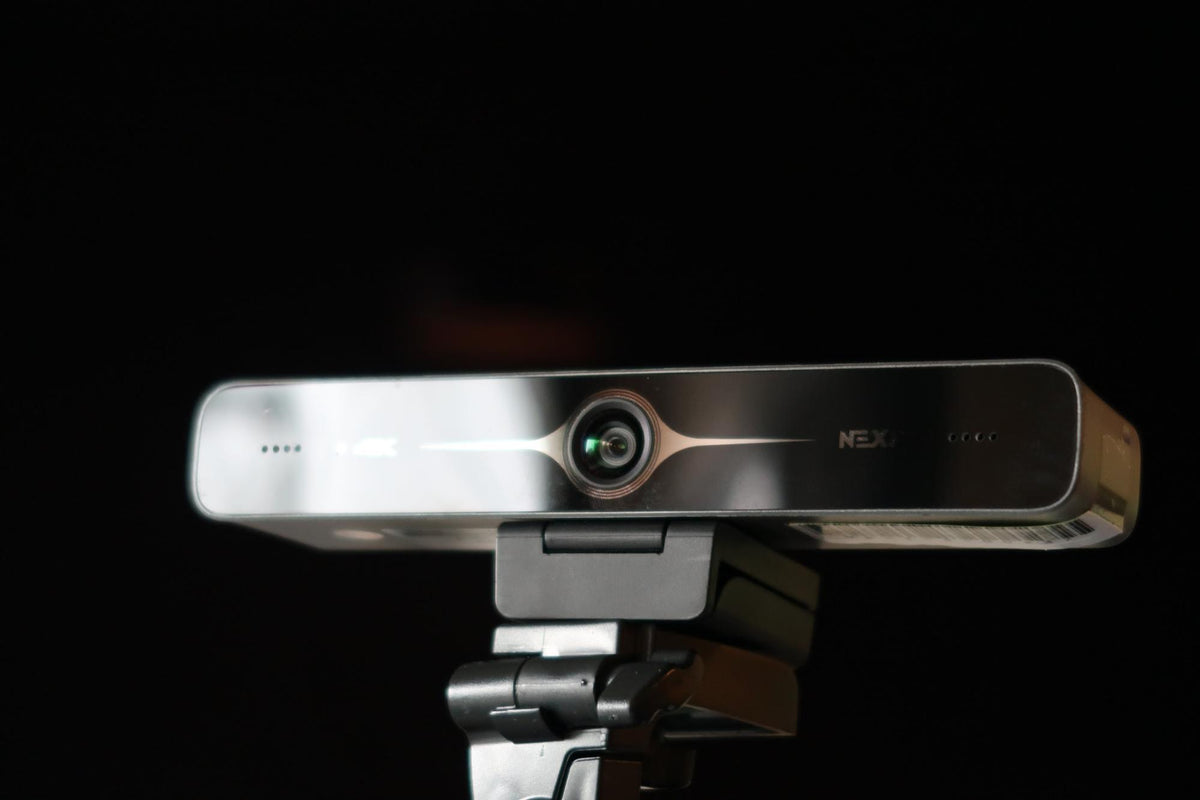
The 4K N970P has every quality you would want in a webcam for use with your TV: a remote control with full settings adjustment, adjustable FOV, a 9.8’ interchangeable cable, and a flexible mount. You can rotate the mount so that it fits on thin bezels, you can fold it so that it lays flat on the table, or you can screw it onto a tripod.
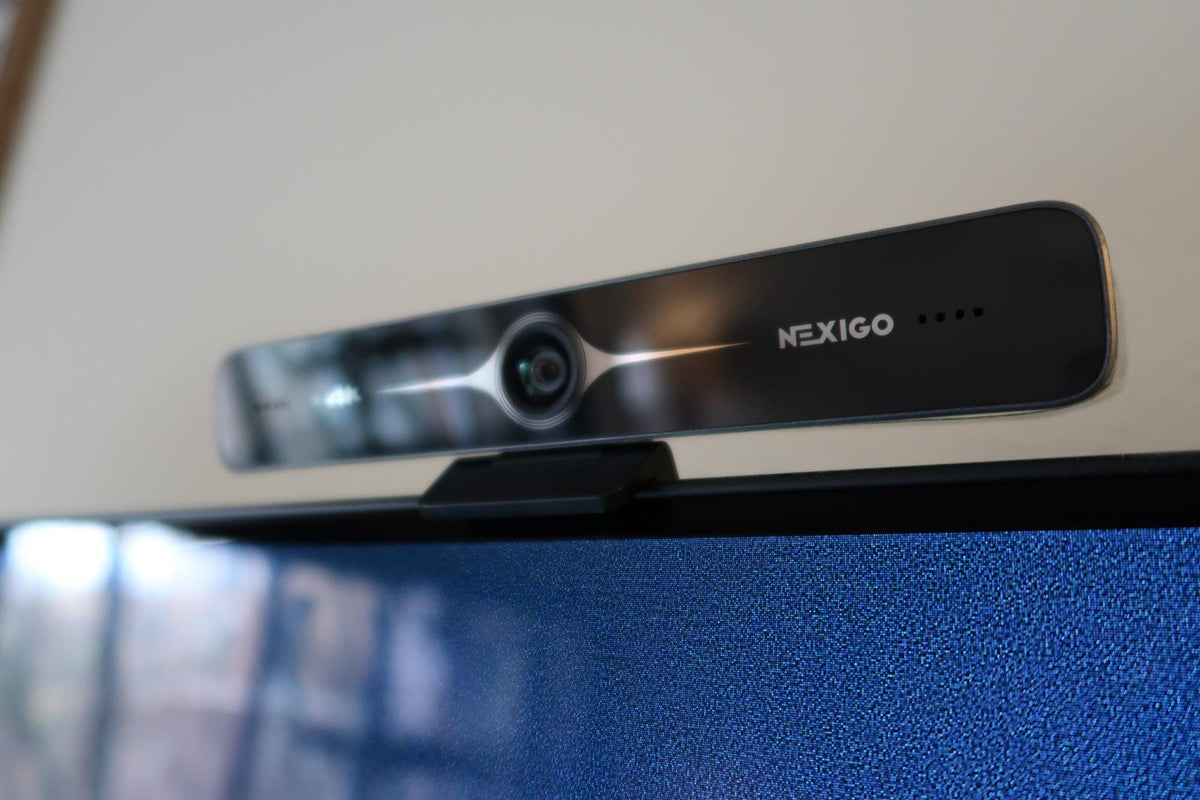
The best part about the N970P is its inbuilt flash memory, which saves your FOVs to presets that you can easily recall later, even if you unplug the camera or use it with a different device. You can purchase the N970P here for $169.99 MSRP.
Best Budget: NexiGo N930AF
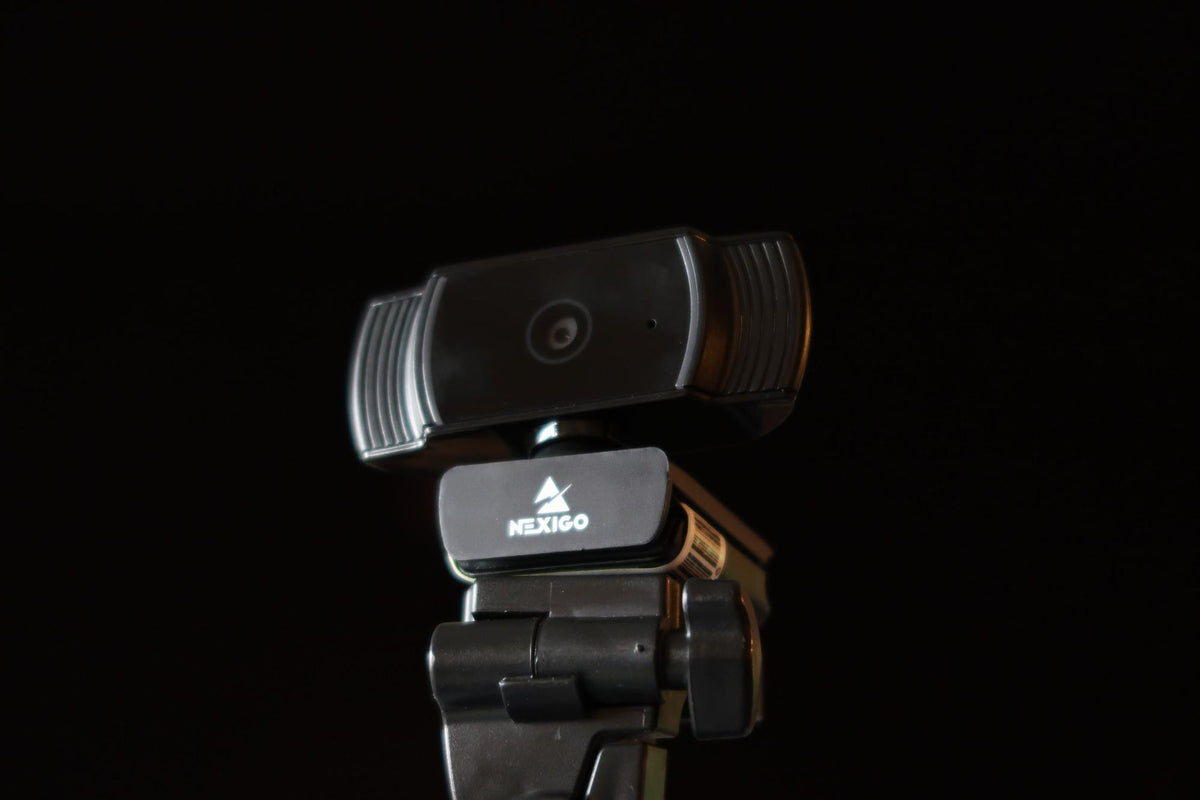
The N930AF is our top pick for a small FOV on a budget. In fact, it features our narrowest angle at only 74°. Its 6.6’ cable is generous enough for most living room setups, and its clip-on mount can rest flat on a table or screw onto a standard tripod. Although this webcam doesn’t have a remote, it does feature automatic brightness correction, so you can rest assured that it will perform well without manual adjustments.
The N930AF is not ideal for TVs with ultra-thin bezels, but it can rest comfortably on top of TVs with slight bezels.
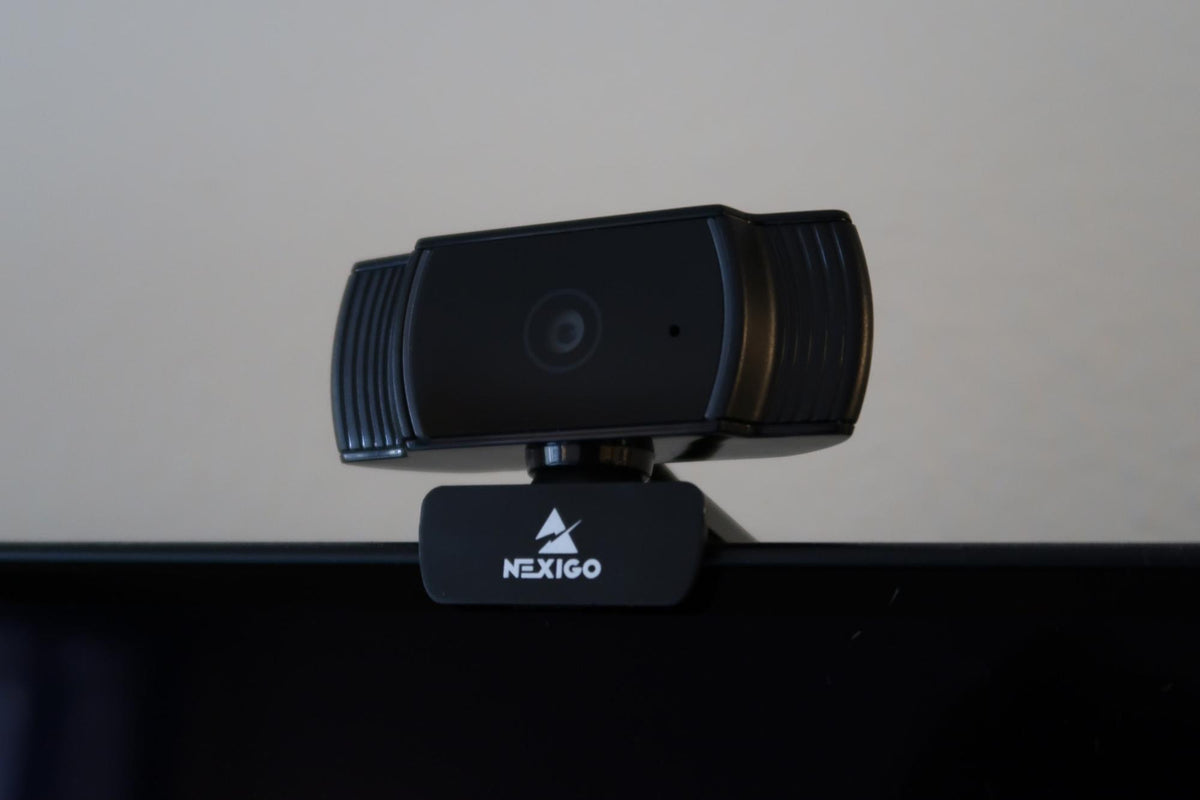
Another quality I love about the N930AF is its intelligent autofocus, which captures you in clear detail at any distance greater than 2.7” (7 cm). This means that it will adapt well to the increased distance between you and your camera when you take calls from the living room. You can purchase the N930AF here for $49.99 MSRP.
Best for Video Conferencing: NexiGo N990
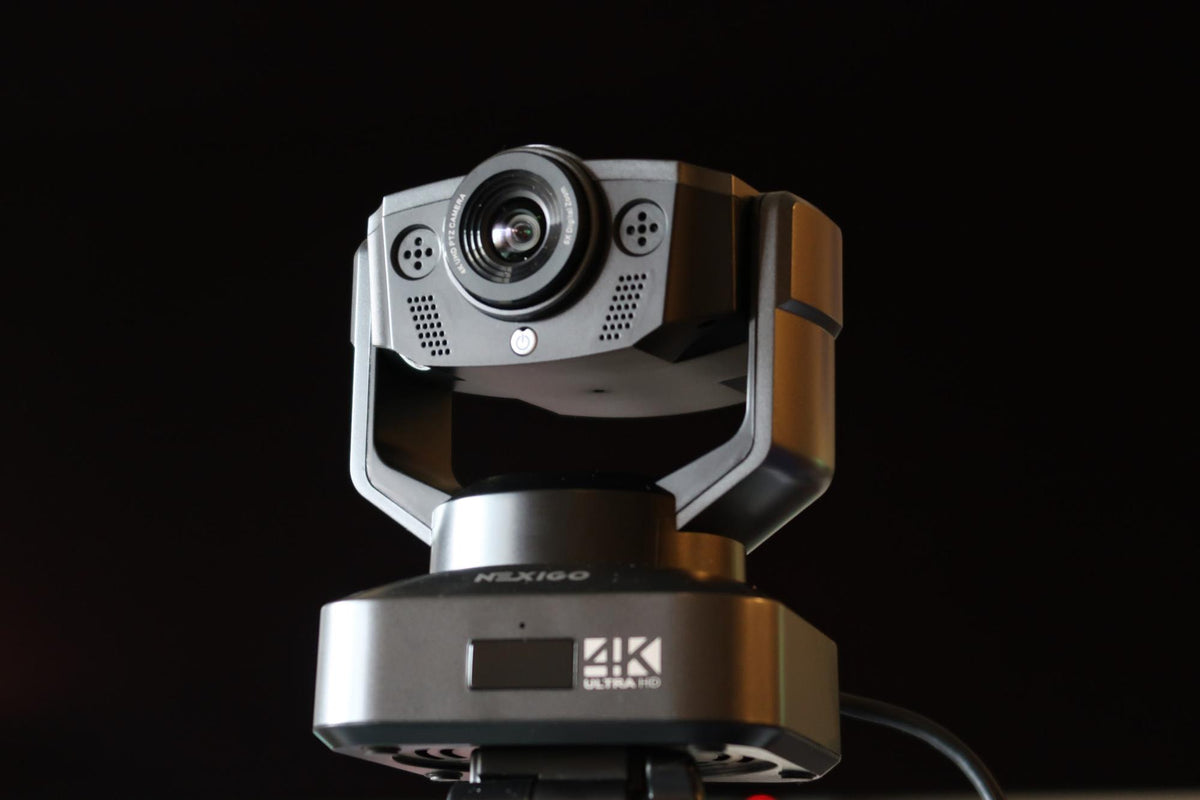
The 4K N990 is a robust conferencing camera that can be mounted in a variety of ways. You can keep it on the tabletop, on a tripod, or even mount it to the ceiling. It also has a remote control, an adjustable FOV, and a long 9.8’ cable.
The N990 can save two positions as presets using flash memory. Its coolest feature — which also makes it ideal for hybrid conference rooms — is its 340° degree rotation and 120° vertical tilt. Together, these features ensure that everyone at the table can share the spotlight. You can purchase the N990 here for $249.99 MSRP.
Best for Family Calls: NexiGo N950P

The 4K N950P features a remote control, an adjustable FOV, a 6.6’ cable, and a thinner clip-on mount that fits safely on thin bezels. Like most other NexiGo webcams, the mount can also be set level on the table or screwed onto a tripod.
What makes this camera great for family calls? Its fixed focus ensures that multiple people can remain in crystal clear focus, as long as they stay at least 10 inches away from the camera.
Compare this to autofocus cameras, which can only accommodate a single depth of field at a time, meaning that everyone in frame would need to stay still at a similar distance away from the camera. If one person were to move forward, the rest of the family would shift out of focus. This can be extremely distracting and create unreasonable expectations for everyone in the family to stay in place.

(Photo by Anna Shvets on Pexels)
With a fixed focus camera, everyone can move around freely and chat with their family more organically. If this camera sounds like the right fit for your family, you can purchase it here for $129.99 MSRP.
Best HDMI Webcam for TV
HDMI webcams are significantly more rare and expensive than USB-A cameras. However, they tend to have some of the most powerful features. We only offer one HDMI-compatible webcam, and it’s our most robust webcam to-date.
The Perfect Multitasker: The NexiGo Iris
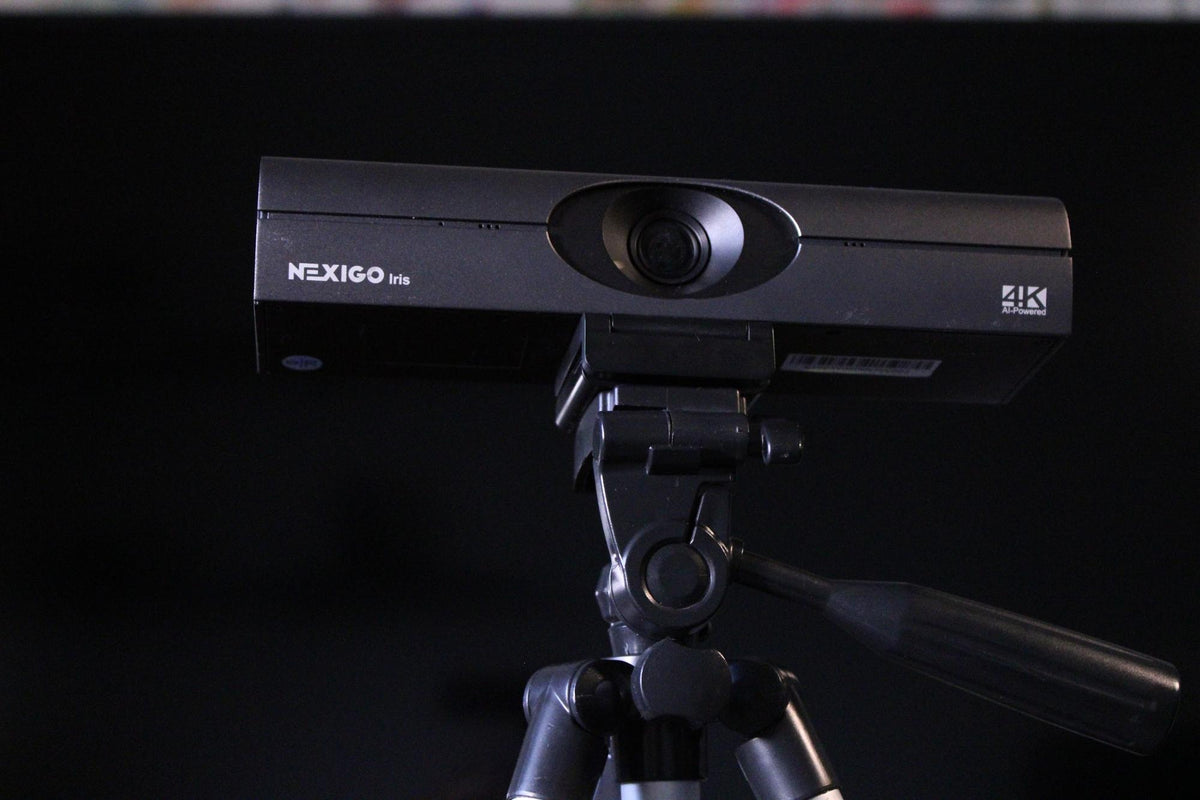
The Iris is a 4K webcam with the image quality to rival a DSLR. Its features include…
- A remote control with full image adjustment;
- An adjustable FOV with up to 10 writeable presets;
- An interchangeable 9.8’ USB cable;
- An HDMI port (HDMI cable not included);
- A clip-on mount with a ¼” tripod thread.
The Iris also has AI-powered tracking and framing tools. Auto tracking follows one person as they move around the room, while auto framing repositions the camera so that it’s centered over every person in the room. This is great for family calls and hybrid workshops, where you’d rather be engaged in the conversation than worry about panning the camera every time someone moves just out of frame.

(Photo by Jason Goodman on Unsplash)
When you pick out an HDMI cable, make sure that it’s 16ft (5m) in length or less to avoid any latency issues. Also, keep in mind that the Iris will need to be powered separately when it’s plugged into an HDMI port.
You can purchase the Iris here for $249.99 MSRP.
Need more inspiration?
Check out our article about choosing the best webcam for every occasion or take a look at our YouTube channel to see videos of our webcams in action.
Whether you work at home or in the office, NexiGo provides a wide range of quality and affordable technology to elevate your daily life. Our products encompass everything from webcams and portable monitors to projectors and gaming accessories.
Articles we think you'll love


