


Note for the NDI License Key:
- All sales are final. Licenses are non-refundable and non-transferable.
- The license key will be sent via email after purchase.
- Please note that each NDI license key is specific to one NexiGo P620 camera.
- Click here to access the guide for using NDI with the P620 camera.


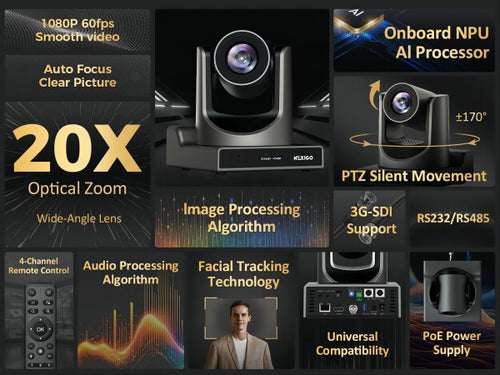
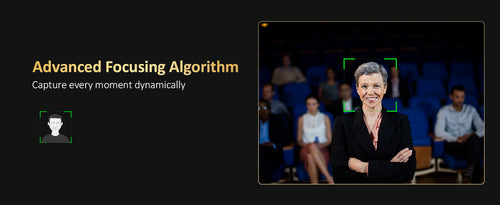

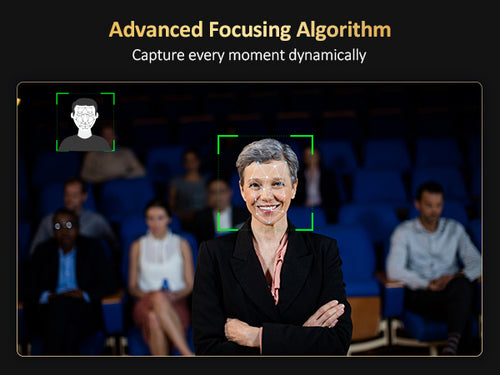
Face Recognition Auto Tracking
Accurately detects people's locations and enables automatic tracking
Swift Setup, Easy Operation
Picture freeze preset and seamless camera position transitions
Face Recognition Auto Tracking
Accurately detects people's locations and enables automatic tracking
Swift Setup, Easy Operation
Picture freeze preset and seamless camera position transitions


Tech Specification
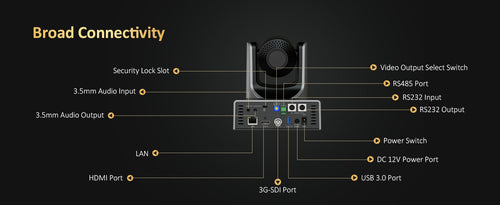
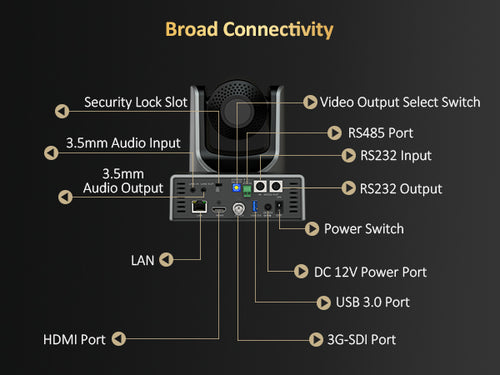
Learn more| LINE IN Interface | 3.5mm Audio Interface |
|---|---|
| LINE OUT Interface | 3.5mm Audio Interface |
| RS485 | 2-pin phoenix port, Max Distance: 4000ft (1200m), Protocol: VISCA / Pelco-D / Pelco-P |
| RS232 IN | 8-pin mini-DIN, Max Distance: 100ft (30m), Protocol: VISCA / Pelco-D / Pelco-P |
| RS232 OUT | 8-pin mini-DIN, Max Distance: 100ft (30m), Protocol: VISCA network use only |
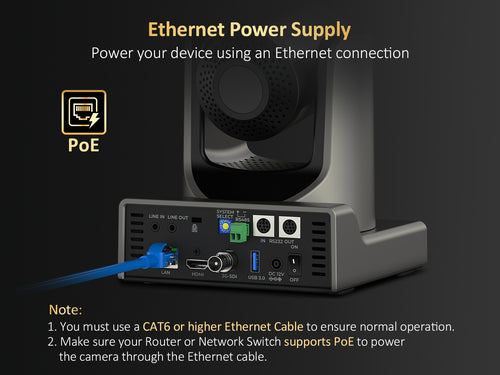
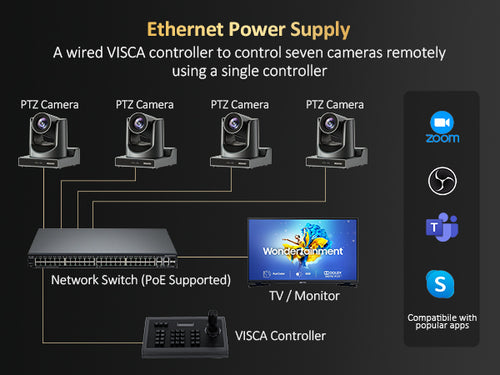
| Network Interface | LAN x 1: 10Mbps / 100Mbps adaptive Ethernet port, PoE supported |
| HDMI Interface | Version 1.3 |
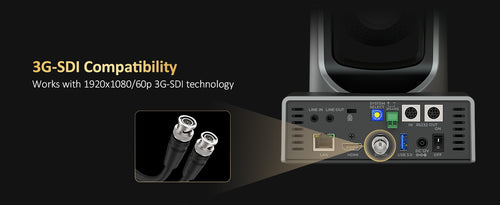
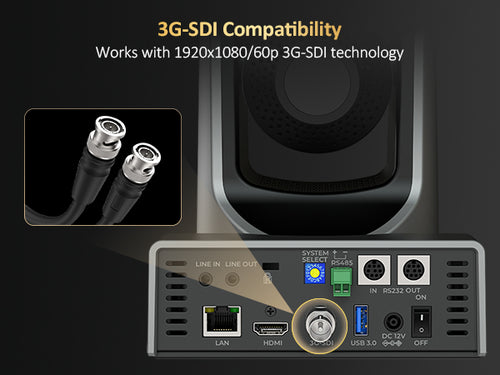
| 3G-SDI Interface | BNC Type, 800mVp-p, 75Ω. Along with SMPTE 424M Standard |
| USB Interface | USB-A 3.0 |
| Power Input Interface | JEITA Type (DC IN 12V) |
| Signal System | 1920 x 1080/60p, 1920 x 1080/59.94p, 1920 x 1080/50p, 1920 x 1080/60i, 1920 x 1080/59.94i, 1920 x 1080/50i, 1920 x 1080/30p, 1920 x 1080/29.97p, 1920 x 1080/25p, 1280 x 720/60p, 1280 x 720/59.94p, 1280 x 720/50p |
| NDI | Supported. *NDI License Key requires additional purchase. *NDI sale is considered final. Licenses are non-refundable and non-transferable. |
| Signal System | 1920 x 1080/60p, 1920 x 1080/59.94p, 1920 x 1080/50p, 1920 x 1080/60i, 1920 x 1080/59.94i, 1920 x 1080/50i, 1920 x 1080/30p, 1920 x 1080/29.97p, 1920 x 1080/25p, 1280 x 720/60p, 1280 x 720/59.94p, 1280 x 720/50p |
|---|---|
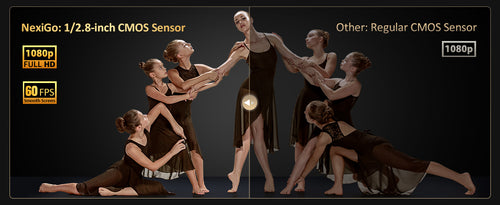
| Sensor | 1/2.8" CMOS, 2.07M Effective Pixels |
| Scanning Mode | Progressive |
| Lens | 20x, f = 4.42mm ~ 88.5mm, F1.8 ~ F2.8 |
| Optical Zoom | 20X |
| Minimum Illumination | 0.5 Lux@ (F1.8, AGC ON) |
| Shutter | 1/30 s ~ 1/10000 s |
| White Balance | Auto, VAR, Manual, One Push, Indoor, Outdoor |
| Backlight Compensation | Supported |
| Digital Noise Reduction | 2D & 3D Digital Noise Reduction |
| SNR | ≥55dB |
| Horizontal FOV | 60.7° ~ 3.36°
|
| Vertical FOV | 34.1° ~ 1.89° |
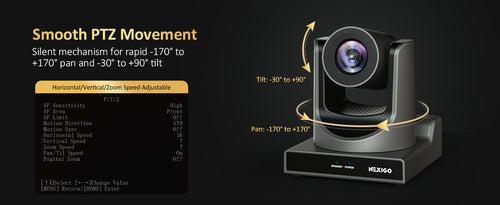
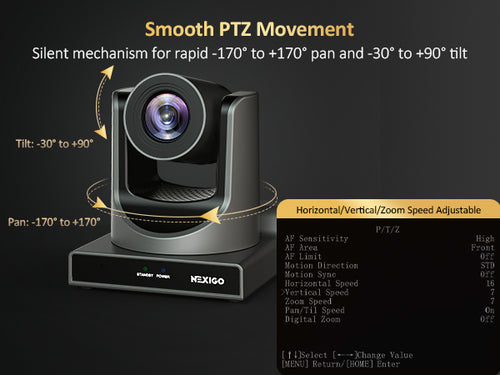
| Pan Angle | ±170° |
| Tilt Angle | -30° ~ +90° |
| Pan Speed | 1.7° ~ 100°/s |
| Tilt Speed | 1.7° ~ 69.9°/s |
| Image Flip | Supported |
| Image Freeze | Supported |
| Preset Position | 255 |
| Preset Accuracy | 0.1° |
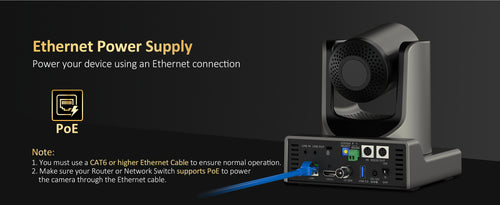
1. Check Your Equipment
- Make sure the P620 camera is connected to the network using a CAT6 or higher Ethernet cable.
- Ensure that the connected Router or Network Switch supports PoE (Power over Ethernet).
2. Check Your Network
- Confirm that the camera is on the same network as any devices connecting to the camera.
3. Reset IP Address
- Open the camera's OSD (On-Screen Display) menu.
- Navigate to Network > Connection and switch DHCP to On to get a new IP address for the camera.
- Enter the new IP address into the address bar in your web browser.
- Use "admin" as both the username and password to access the camera.
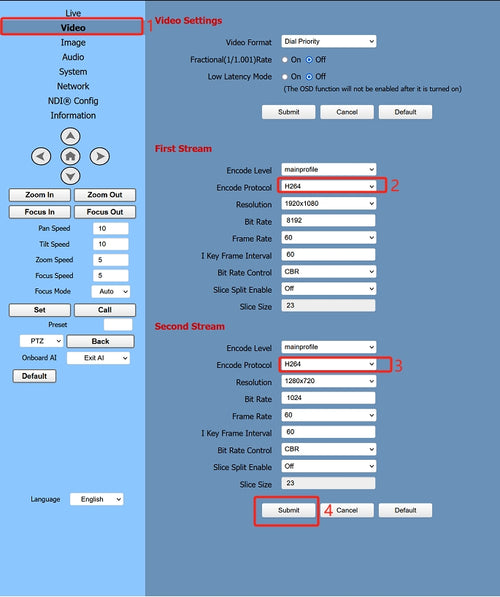
1. If Only Ethernet Connection Is Active:
- Navigate to the Video tab
- Set the Encode Protocol of the First Stream to H264.
- Set the Encode Protocol of the Second Stream to H264.
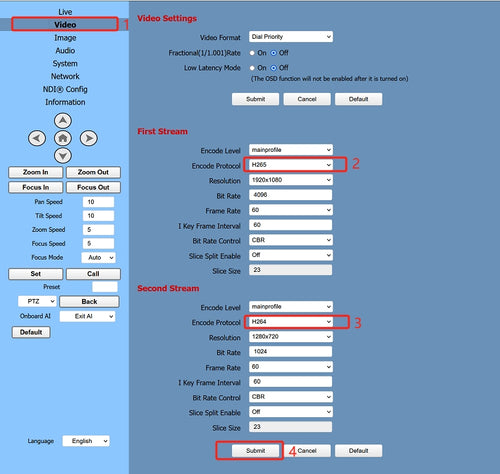
2. If USB and Ethernet Connection Are Both Active:
- Navigate to the Video tab
- Set the Encode Protocol of the First Stream to H265.
- Set the Encode Protocol of the Second Stream to H264.
- Launch OBS Studio on your computer, click "+" under the Sources menu at the bottom of the page, and select "Media Source".
- Select "Create new", click "OK", and on the next page Deselect "Local File"
- In the "Input" field, enter "rtsp://" followed by the IP address of your camera, followed by "/1" (e.g., "rtsp://192.168.100.88/1").
- Click OK to save the settings. The live feed from the camera should now appear on screen.
1. Check that the camera is stable and installed in a location with no more than a 15° incline.
2. Ensure that there is no vibrating machinery near the camera.
1. Install the VLC plug-in. This software is required in Internet Explorer due to HTML 5 restrictions.
2. Download and install the 32-bit VLC media player at the VLC website (http://www.videolan.org/vlc).
3. After it's installed, the video feed from the camera should display normally.
4. Other mainstream browsers that already support HTML5 do not require the VLC plug-in to display video from the P620 camera. Compatible browsers include Microsoft Edge, Google Chrome, and Safari.
1. Check whether the camera protocol, address, and baud rate all match.
2. Check that all cables are firmly plugged in.