


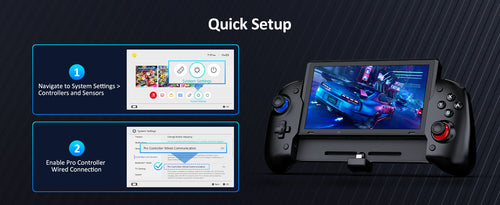
Support
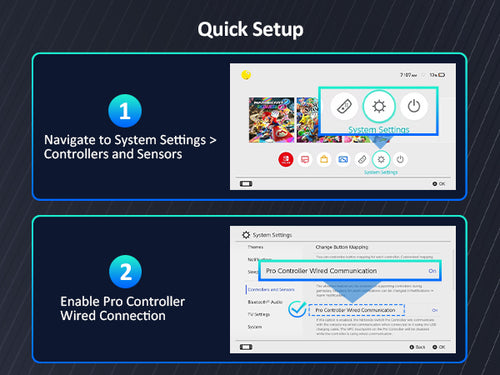
Step 1
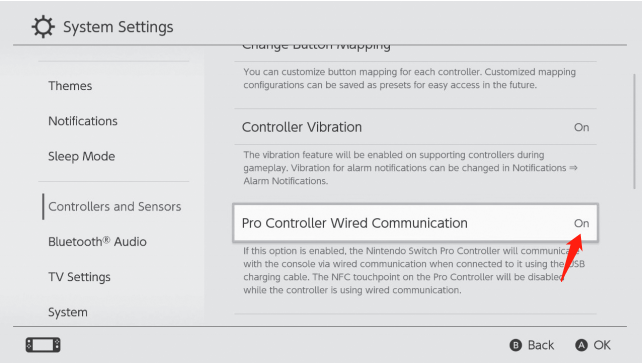
Please enable the Pro Controller Wired Communication setting in the Switch / Switch OLED console itself. You can do this by going to System Settings > Controller and Sensors > Pro Controller Wired Communication. Set the Pro Controller Wired Communication to On.

Step 2
Slide the Switch OLED console into the controller and plug it into the USB-C port at the bottom.
Note (for Switch OLED): The charging port won't line up perfectly due to the OLED's larger size. While sliding in the console, please push/pull the bottom of the console to ensure a proper connection.

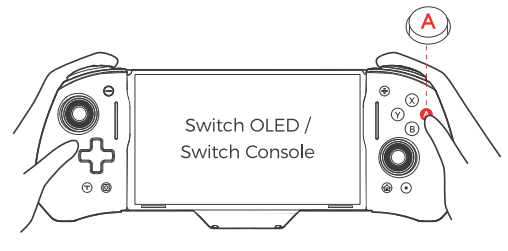
Step 3
After you have done so, press the A button on the controller to connect it to the console.