Dual Core 2.5GHz or better for 1080P resolution;
Dual Core 3.2GHz or better for 4K Resolution
Memory
4GB for 1080P resolution; 8GB for 4K Resolution
Graphics
512MB Graphic Memory for 1080P resolution; 1GB Graphic Memory for 4K resolution
iMac MacBook
Requirements
Processor
Dual Core 2.5GHz or better for 1080P resolution;
Dual Core 3.2GHz or better for 4K Resolution
Memory
4GB for 1080P resolution; 8GB for 4K Resolution
Model
MacBook Pro 13" (2018 or later) with a BlackMagic Design eGPU or eGPU Pro; MacBook Pro 15" (2018 or later); MacBook Pro 16"; iMac Pro (2019 or later); Mac Pro (2019 or later)
Note:
Video may not be synchronized with audio at 4K resolution due to the differences in Mac CPU performance, but this can be synchronized with the free software OBS.
Technical Specifications
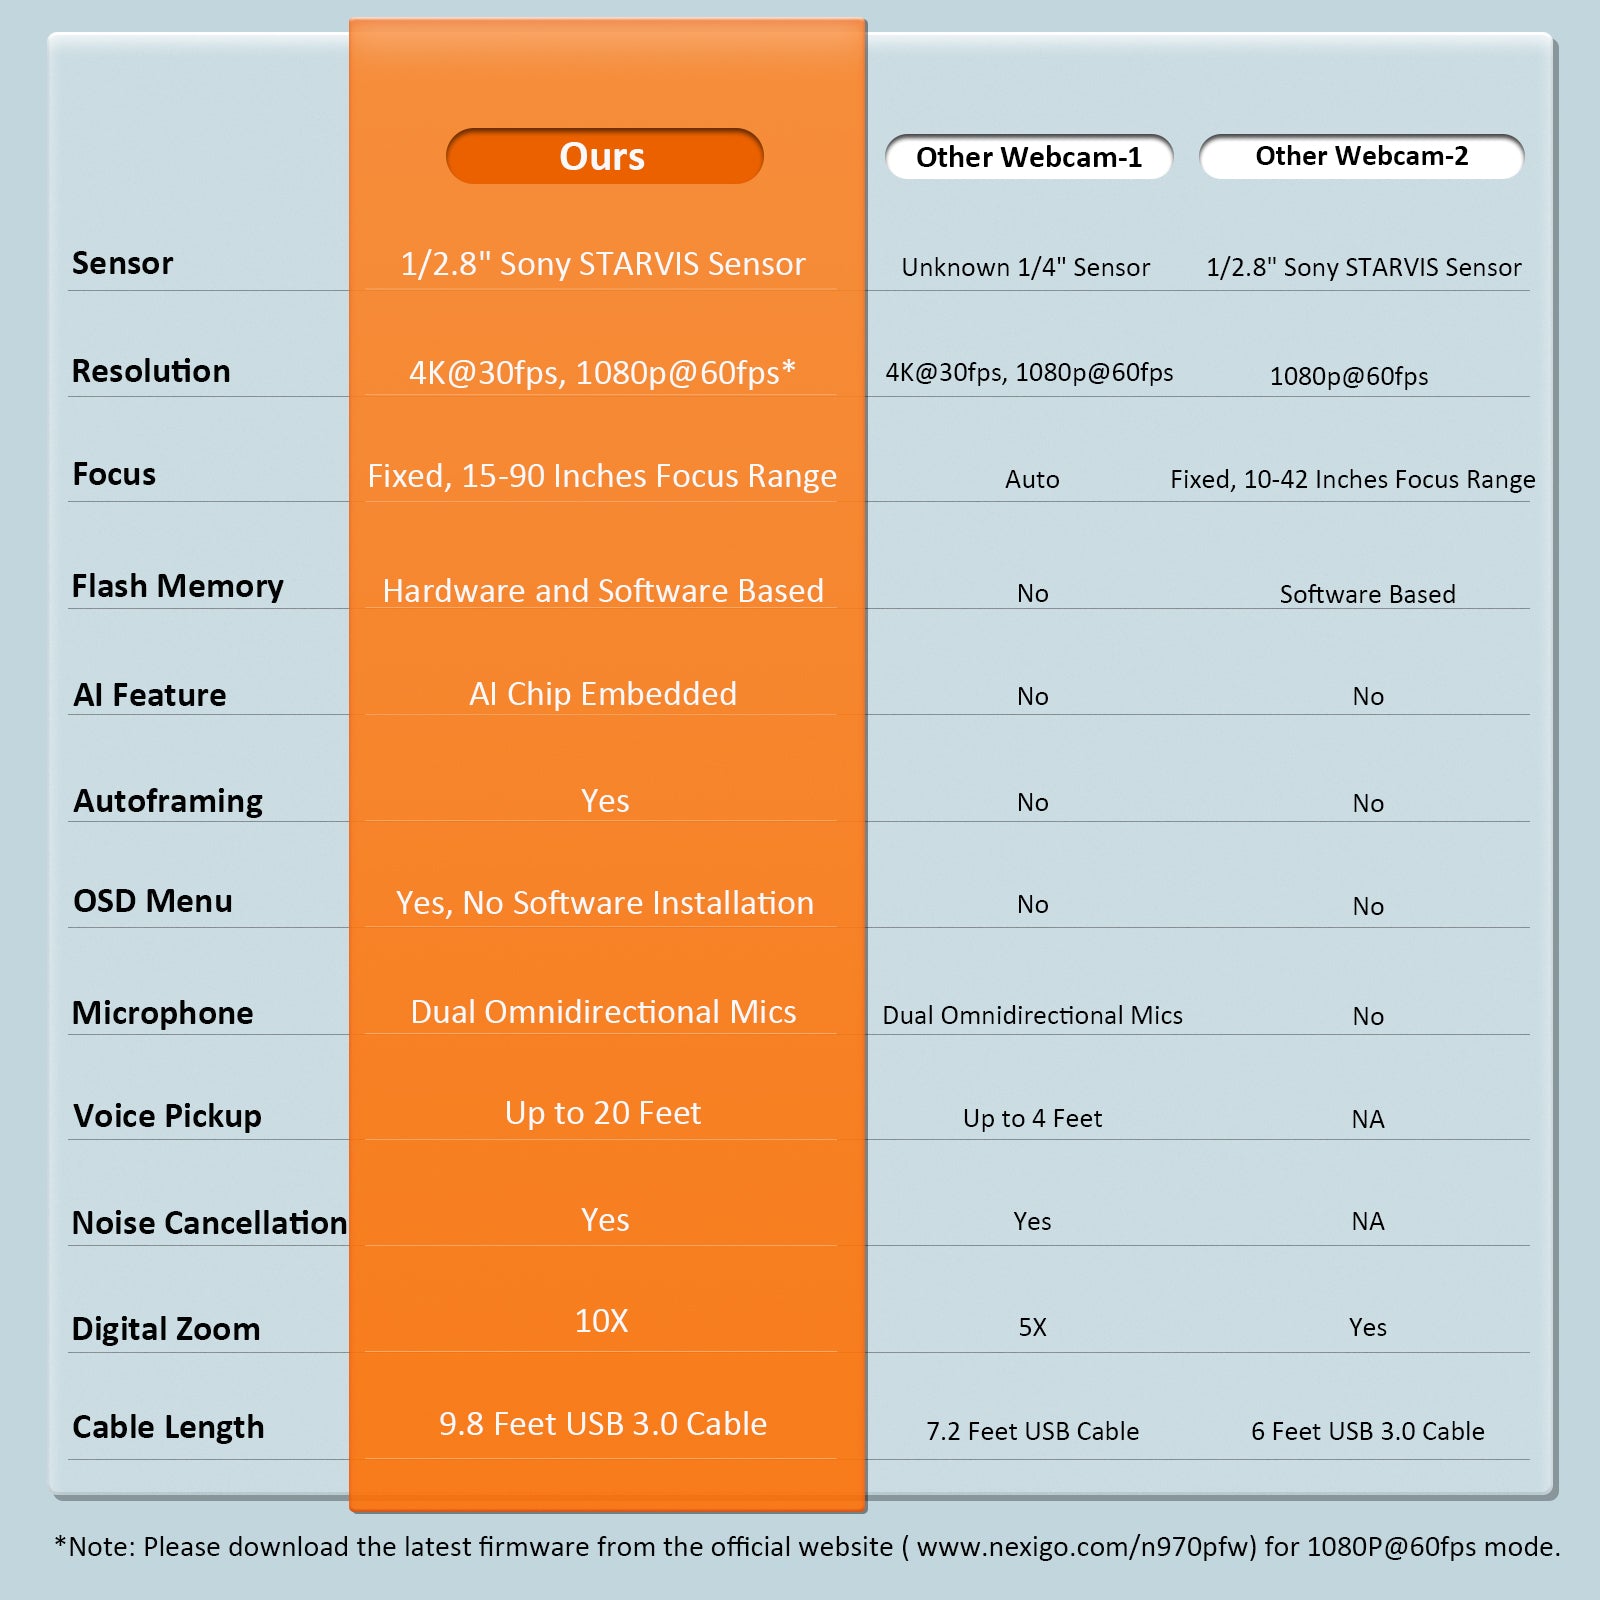
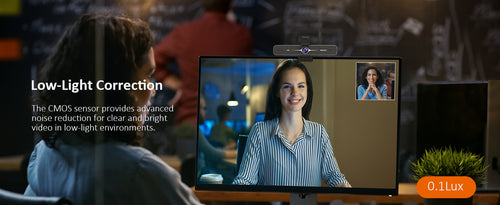
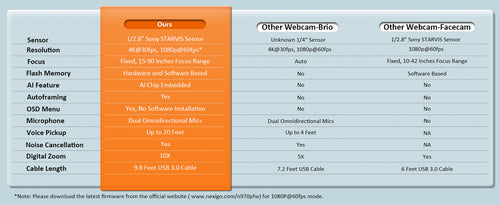
Image Sensor: 1/2.8 inch Sony Sensor Active Pixels: 8.5 Megapixels Maximum Resolution: 3840 x 2160@30fps Video Format: YUY2/MJPG/NV12/H.264 
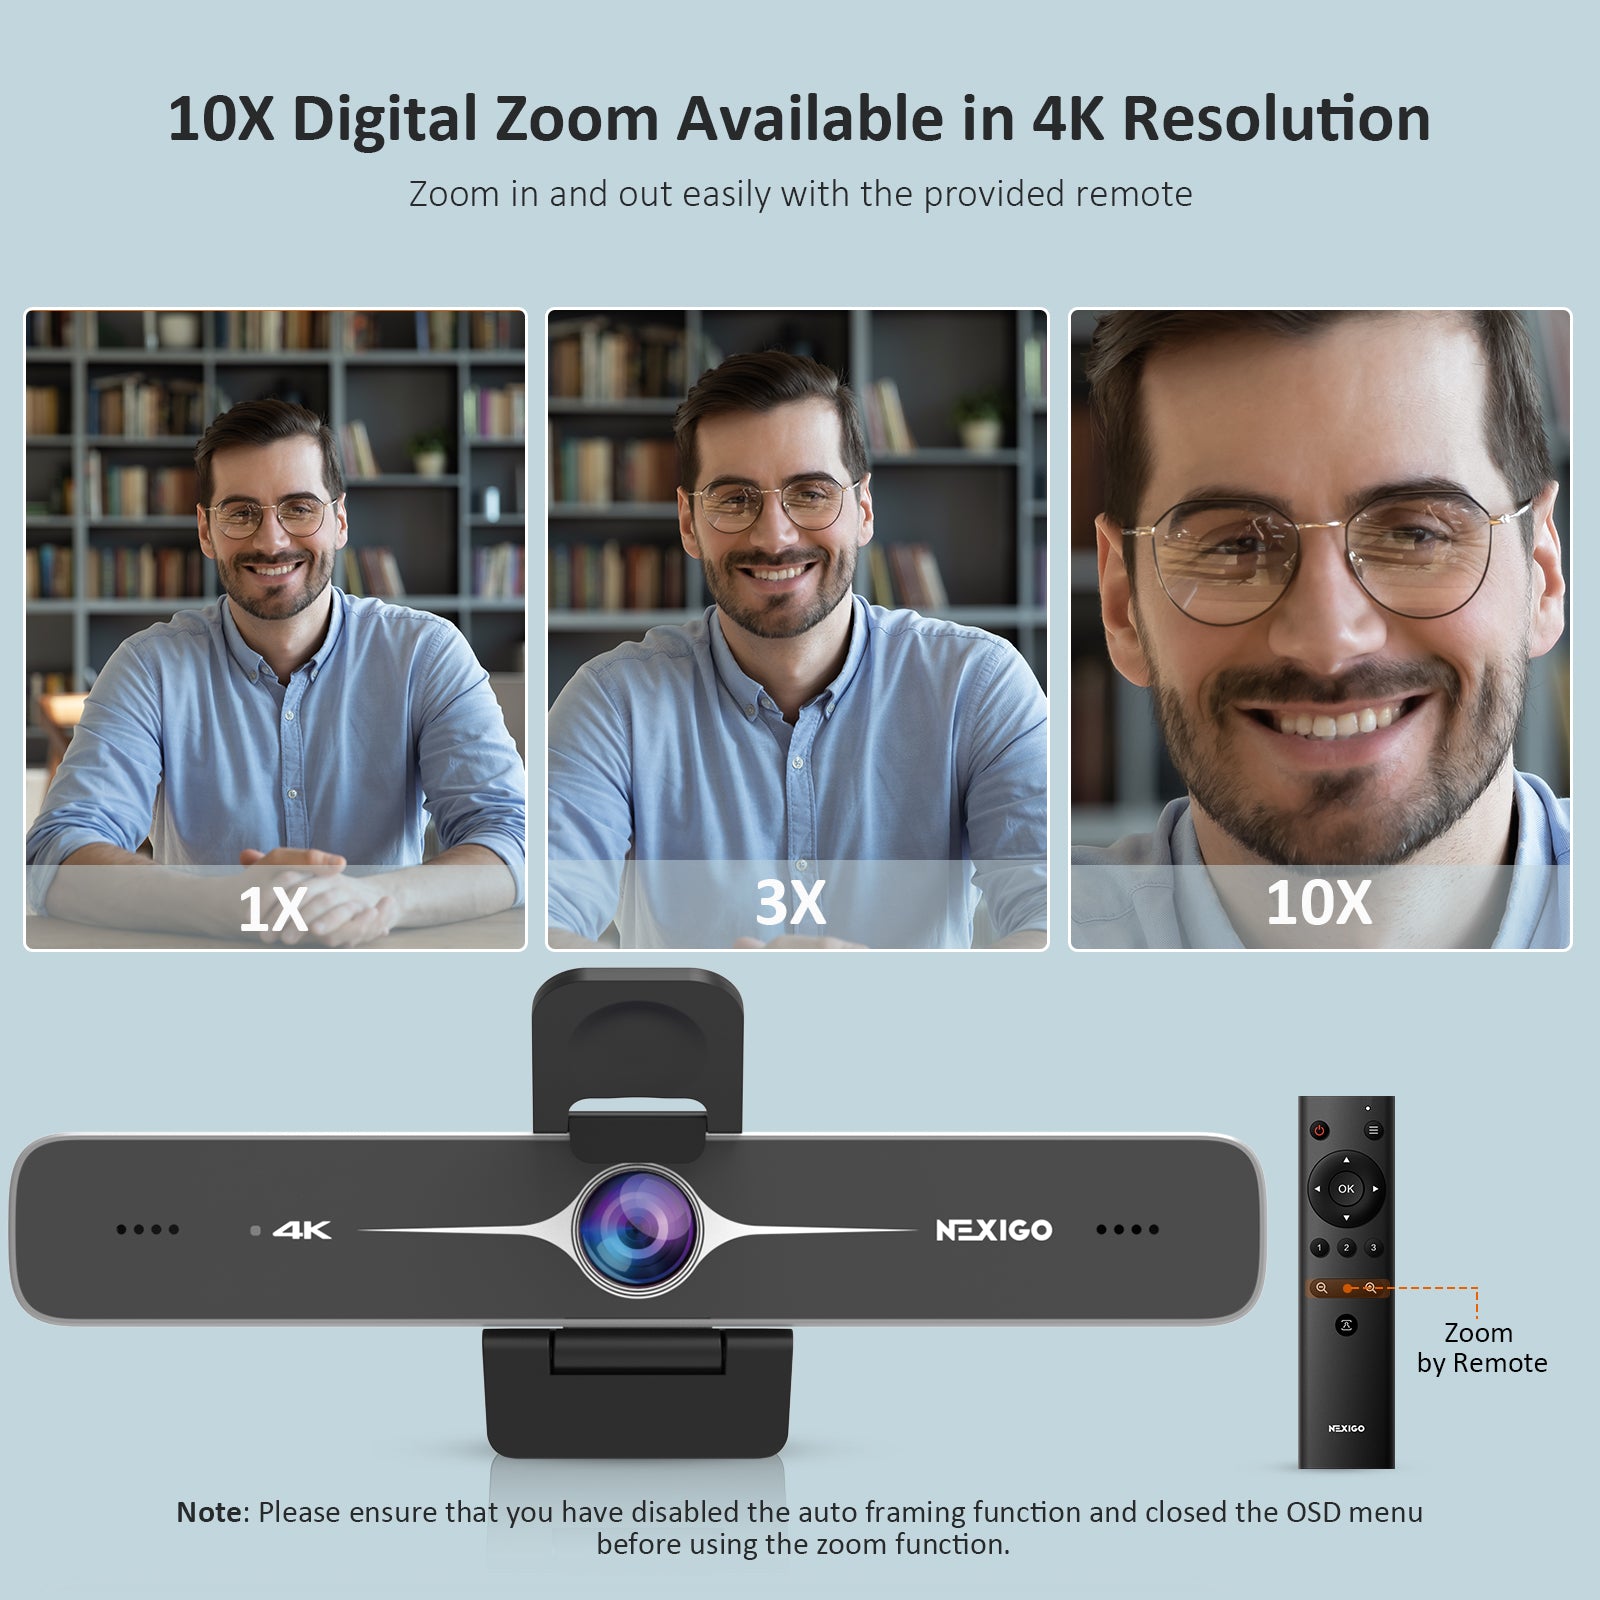
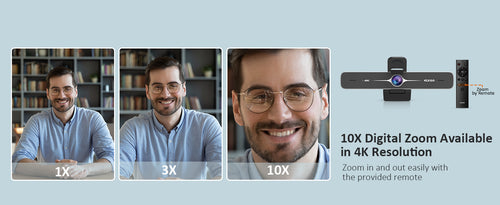
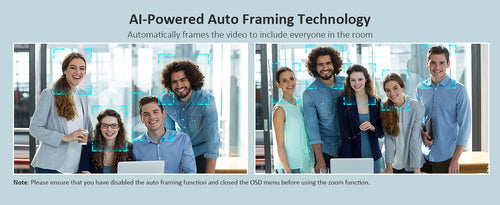
Digital Zoom: Up to 10x digital zoom at 4K@30fps Focus Type: Fixed focus Field of View: D=90°/H=83°/V=54° Microphone: Dual noise-canceling mics Connectivity: USB 3.0 (compatible with USB 2.0)
Compatible System
Windows: Windows 7/8/10 or above macOS: macOS 10.6 or above Android: Android 5.0 or above Linux: Linux 2.6.24 or above Chrome OS: Chrome OS V29.01547 or above Ubuntu: Ubuntu V10.04 or above
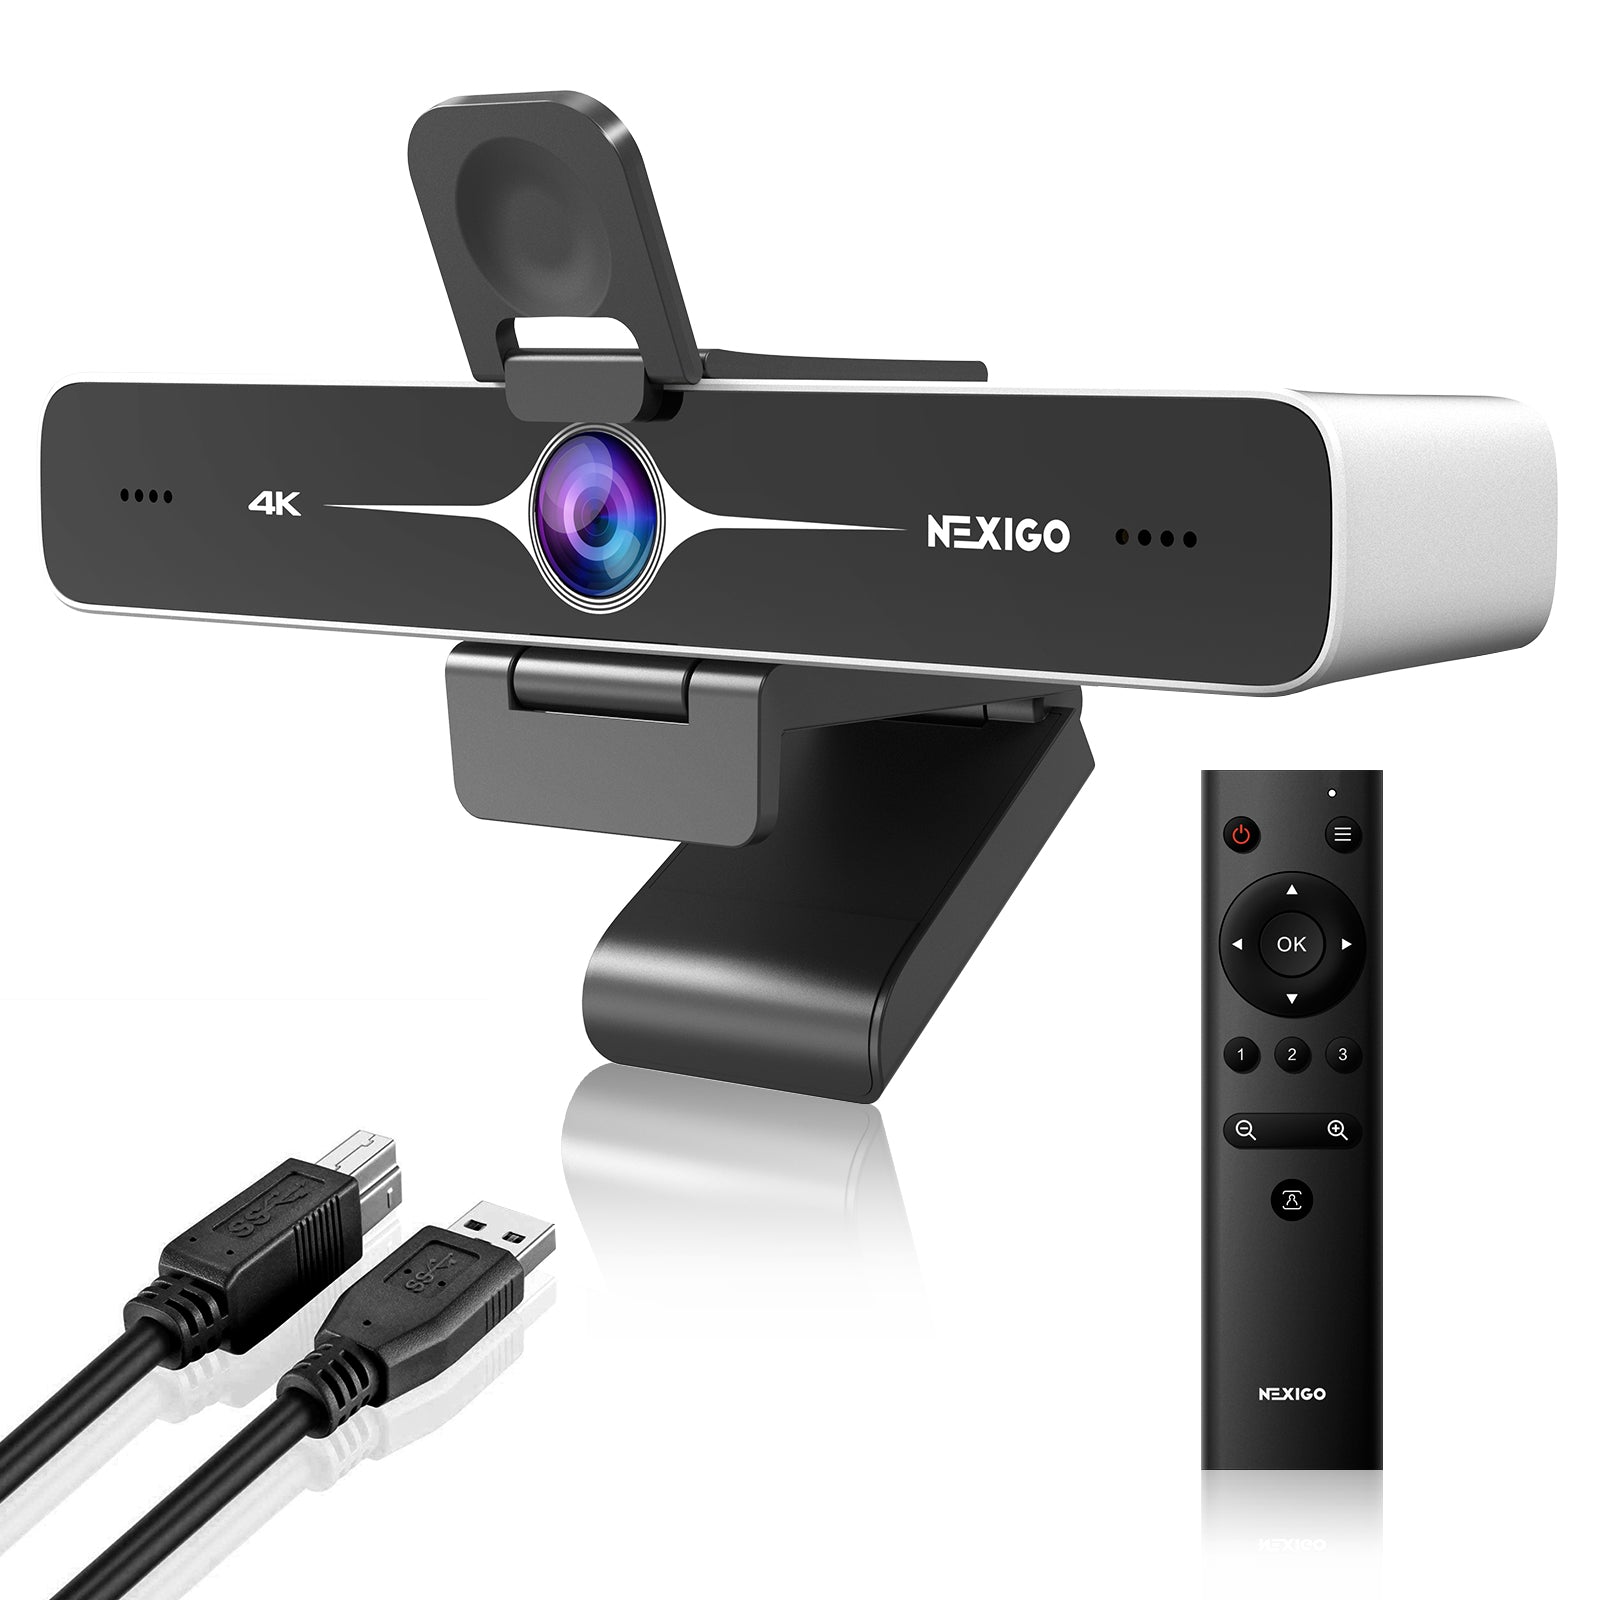
What's in the Box
1 x 4K ePTZ Camera 1 x USB-B to USB-A Cable 1 x User Manual 
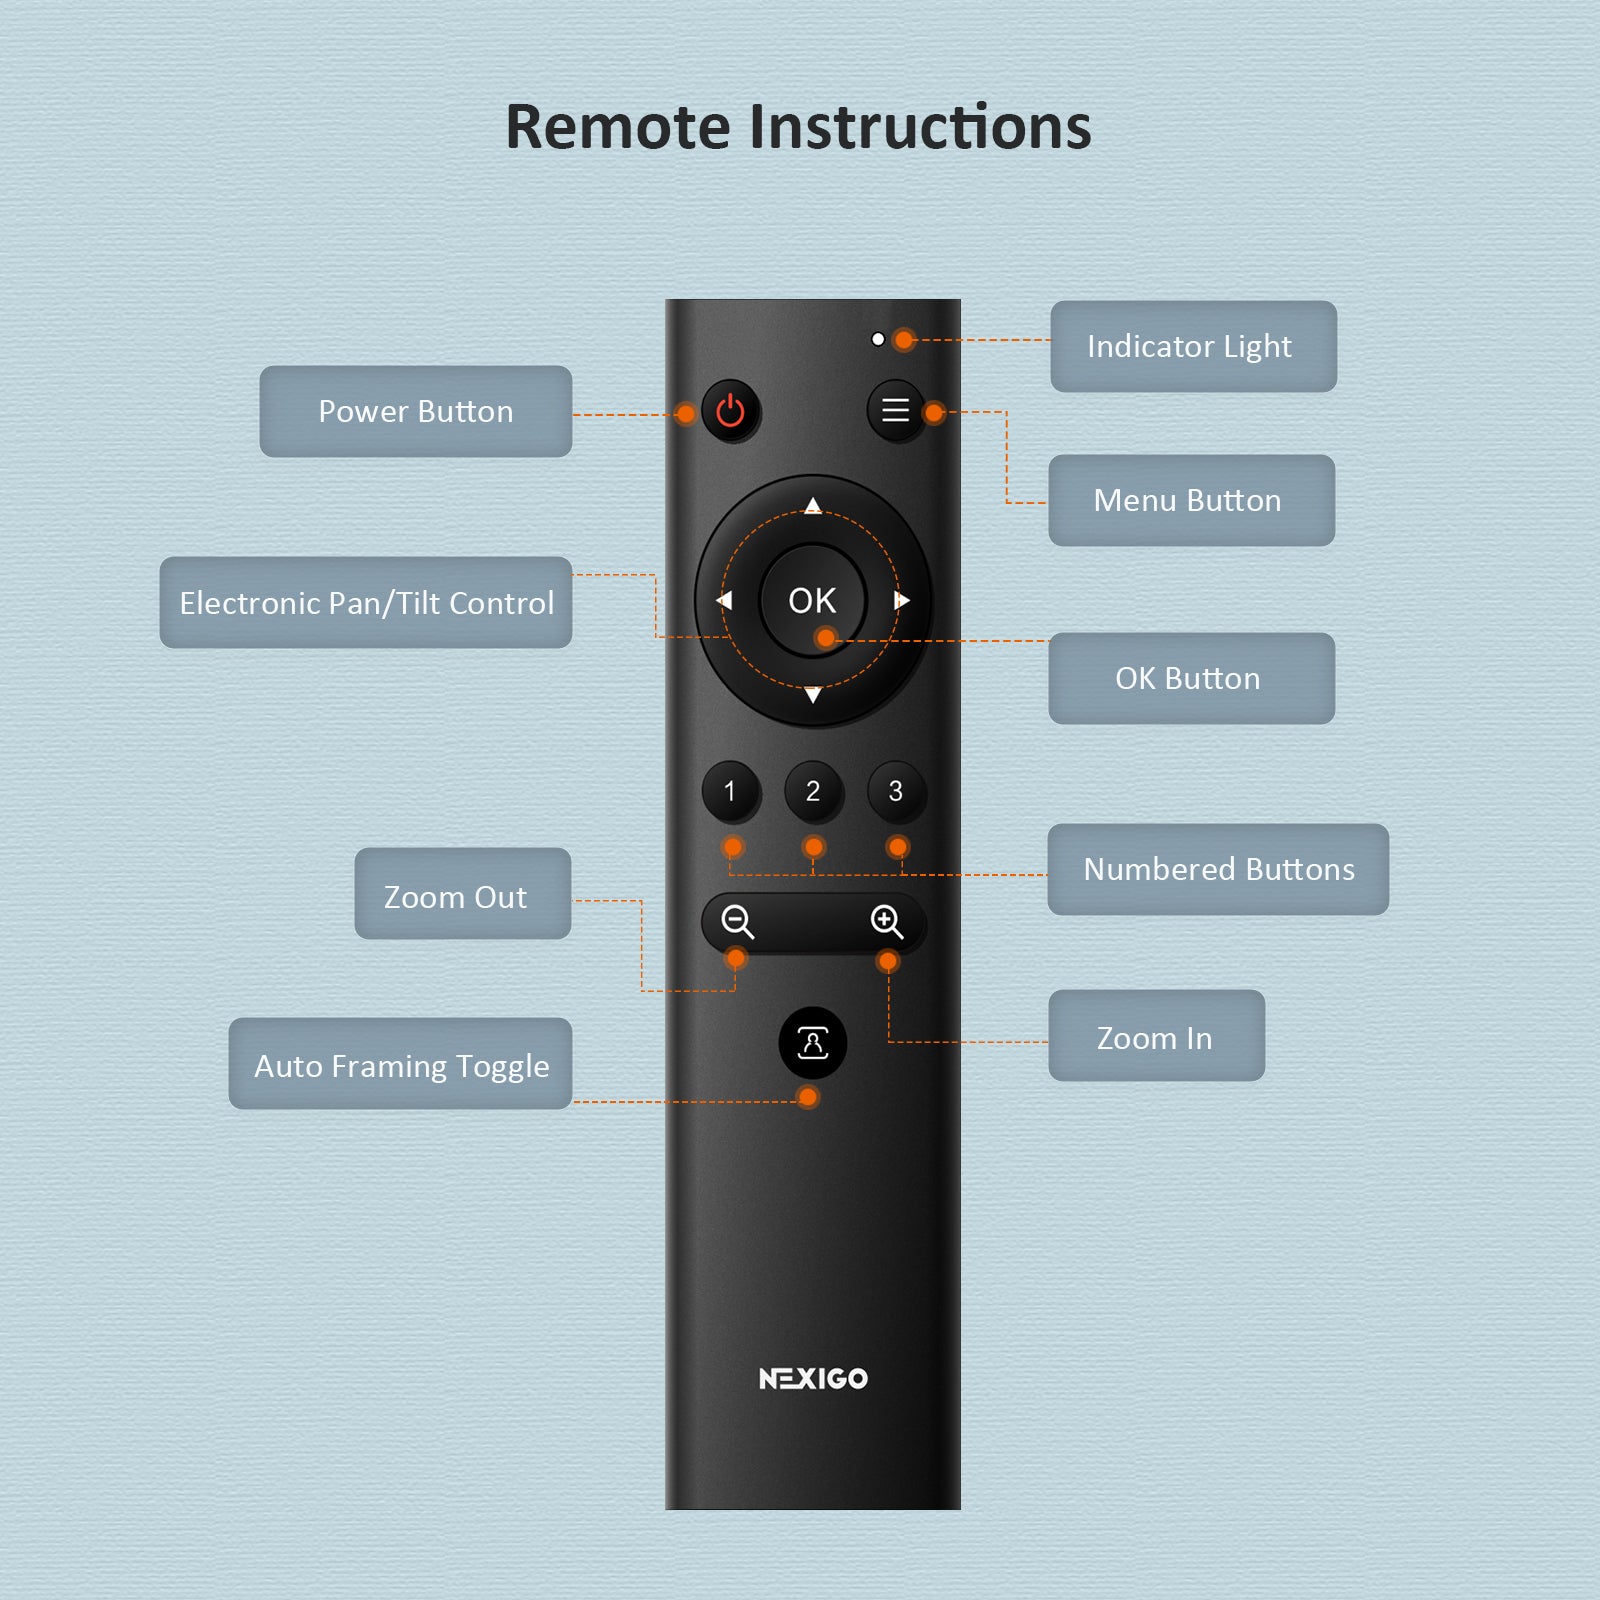
1 x Remote (Requires 2 AAA batteries, not included)
Please refer to pages 4-6 of the user manual here.
Preset Settings:
Step 1. Adjust the camera view to fit your needs. You can zoom in/out using the zoom buttons or pan and tilt the camera using the arrow buttons.
Step 2. Press the Set Preset button. This will cause the camera to enter Preset Setting Mode.
Step 3. Press any Preset Position Number button (0 to 9) to save your preset. It will be saved to this slot and will override any previously saved preset. After the setup is complete, a "Set preset: #" will be shown in the upper left-hand corner of the image with the number of the preset that was selected. Example: Set preset: 1.
Remove Preset Settings:
Step 1. Press the Clear Preset button. This will cause the camera to enter Remove Preset Setting Mode. Step 2. Press any Preset Position Number button (0 to 9) to clear the settings saved in the corresponding button. After this is done, the message "Clean preset: #" will be shown in the upper left-hand corner of the image to indicate that the preset has been removed.
These four buttons do not currently have any necessary function. They can be used to set the webcam to a different channel, but this function is not currently supported.
These buttons do not currently have any function.
There are several reasons this could happen:
1. There is something wrong with the USB port. Please use a different USB port or another PC and test the camera again.
2. The PC does not recognize the camera device. Please install any available updates and check with the PC manufacturer if the problem persists.
3. The operating system and computer configuration do not satisfy the requirements of the camera. Please check your system specifications.
4. The video preview feature of the application is not turned on, or the application has a privacy feature that prohibits access to the camera. Please adjust the application's privacy settings or try a different application.
Please ensure that the light in your environment is free of unique tones or intense light sources. Things such as walls/floors/other large-area non-standard light sources, including areas with colored or intense light.
In such environments photographed pictures are subjected to color cast due to the lighting impact of these light sources.
For Windows & Mac:
Using the NexiGo Webcam Settings Software, you can adjust the image parameter you want according to your needs.
Note: Download the NexiGo Webcam Settings Software from nexigo.com/software.
The latest unboxing reviews
I’ve Never Seen THIS Before!!! - NexiGo N970P 4K Webcam