

Creating a DIY Webcam Photo Booth
By: Derek Wells
A photo booth can be a fun addition to an event like a graduation, wedding, or family reunion. Photo booths give people a chance to create great memories and even act a little silly. They also take us back to a time before ubiquitous selfies, when getting your picture taken was a special occasion. And if you use the right camera for the job, they can create higher quality images than a typical selfie camera.
So follow along as we discuss how you can make a portable photo booth of your own, whether it’s for a one-off event or the beginning of a new freelance job as a photo booth operator!
DIY Photo Booth Components
There are several components that can go into a portable photo booth, and there are plenty of tutorials out there on how to put a photo booth together, so we’ll keep it simple and stick to the basics. To begin you’ll need:
- A modern laptop or small form factor (SFF) desktop computer
- A good quality webcam with 1080p resolution or higher (We of course recommend a NexiGo webcam like the N960E)
- A tripod or arm for your webcam
- A touch screen or tablet to act as the interface for users
- A ring light or glow light (if your webcam doesn't have one built-in)
- A portable printer and photo paper (if you're not keeping it digital)
- A USB 3.0 hub to power everything (if your computer doesn't have enough ports)
- A shell for all of that to go in (build one or buy one!)
- A portable speaker (if you’re using audio)
Most of these are self-explanatory (or covered in any tutorial), and there is a lot of flexibility for different budgets. So we’ll focus on the two most complicated parts of a photo booth — the camera and the software.
But first, a note about the touch screen:
There are a few different options for photo booth touch screens. One is to use a small, cheap screen like those made for the Raspberry Pi mini PC. An application like dslrPhotoBooth can be controlled using an external touch screen or the user’s phone. One of the best ways to set up dslrPhotoBooth is to use a large-screen tablet since you probably have one of those sitting around anyway. Apps like Duet Display (for Apple devices) and the free Spacedesk (for Android) will let you transform your tablet into a touch screen that people can use to interact with the photo booth.
The Best Webcams for a Photo Booth

This photo was taken on Mac’s Photo Booth App with a NexiGo N960E.
The most essential part of your photo booth is the camera itself. If it’s not good enough (or just not the right one for the job), nobody will be satisfied.
For photo booths, we recommend using webcams with a field of view that’s wide enough to get multiple people in one shot, but not so wide that one person would look lonely. We recommend around 78° since it’s just narrow enough that you won’t notice image distortion (the classic “fish-eye effect”) that could be less than flattering for many users.
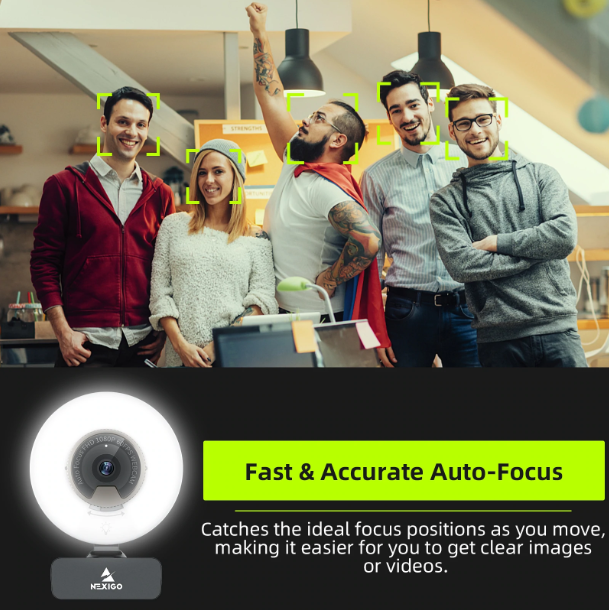
A webcam with fast and accurate autofocus is also recommended, since your customers will be moving and posing, and you don’t want them to leave disappointed when the image you produce is a blurry mess. For that reason, a large sensor with good low-light performance is recommended. With all that in mind, here are a few of the best NexiGo webcams for photo booths.
The NexiGo N960E is our top choice for a photo booth webcam. Its most obvious standout feature is the adjustable ring light that circles its lens. This is a great solution for the difficult lighting conditions you might encounter at the kind of event where you would bring a photo booth. You always have the option of starting out with the ring light off during the day and turning it on as it gets dark. But its advantage over other photo booth cameras is that it captures in 1080p at 60fps, which means the video on the touch screen will be smoother and you’ll be less likely to capture blurry photos.
The NexiGo N660P is the photo booth webcam for you if you prefer to handle lighting yourself, since it doesn’t include a built-in ring light. It’s a budget-priced winner in every way, with excellent autofocus and automatic light adjustment. Plus it comes in three fun colors, so you can choose one to match your photo booth!
The NexiGo N680E is the little sister of the N960E. Like its big sister, it has an adjustable ring light and a 2 Megapixel 1/2.7-inch sensor with autofocus capability. The main difference between the two is that the N680E doesn’t support 60fps video. It captures 1080p video and encodes it using the h.264 codec at 30fps, which results in less fluid motion. But for a photo booth where you’ll mostly take still images, this isn’t a big problem.
What is the Best Photo Booth Software?
Now for the finishing touch — the photo booth software. But first, we have to choose a platform! Macs are certainly popular with the photography crowd, but they’re not the most affordable. Most people have access to a Windows laptop though, so that’s the platform we’ll focus on.
One advantage if you’re using a Mac is that there’s the built-in Photo Booth app! And if you have a Mac and are happy with that, by all means, use it. However, we believe most people who want to create a photo booth are looking for something a little more powerful and flexible. As such, the photo booth software we recommend for both Windows and Mac users is dslrPhotobooth. This app has a free trial, so you can see if it’s right for you before you buy it.
Setting up dslrPhotobooth

A photo booth should be quick and easy for people to use, without requiring them to fiddle with a lot of settings. However, getting it to this point and producing quality results will take some setup on your part. To start, once you open dslrPhotobooth you’ll want to create an event and open its settings. There’s a lot you can adjust, which can be a little overwhelming at first, but everything is well organized into menus and a lot of the options are less essential for most setups.
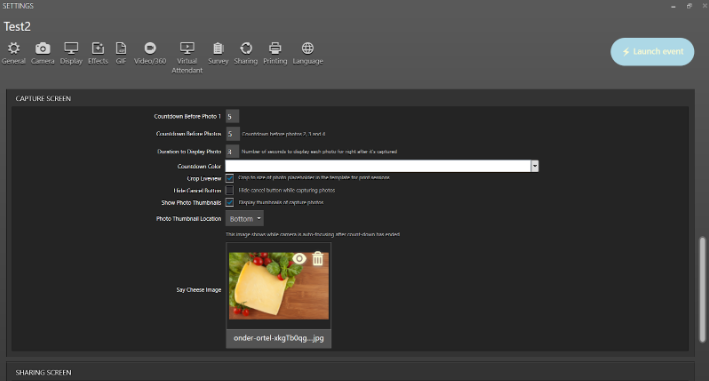
Here are a few of the most important settings
When you open the app, dslrPhotoBooth will display a menu on the touch screen along with video footage from your webcam with a countdown before each photo is taken. By default, your webcam will shoot four photos with a 5-second timer between each, so your users can get in and out in less than a minute. This default setting is probably the most common one since it’s reminiscent of mall photo booths, but it’s far from the only option. You can easily customize the number of photos for each user, add effects like filters and digital props, and adjust the countdown timer.
For instance, you can change the colors of the app’s interface to match the event — such as the colors of the décor or the bridesmaid’s dresses at a wedding.
You can turn on post-processing or a “beauty filter” that smooths skin, and you can even add a watermark to commemorate the specific event, like a wedding or a party, or the venue hosting the event.
You can even choose a voice to instruct people on what to do for each photo. For example, at a birthday party, you can have the person whose birthday it is, tell people to act out “your favorite memory of me.” You can play this audio using a portable Bluetooth speaker or, if you’re using a tablet as your touch screen, through its built-in speaker.
Once you’ve done all this, it’s time to test your photo booth. Of course, the results will have a watermark for now, but if you’re happy with how dslrPhotobooth works then you can buy the app to remove it.
After you’ve tested and tweaked your photo booth set up to your liking, it’s time to start booking events! Good luck out there!
