

Article Overview
Is it cheating to use a projector for art?What You’ll NeedStep 1: Upload your image onto your projectorStep 2: Secure your drawing surfaceStep 3: Mount your projectorStep 4: Make sure it’s darkStep 5: Calibrate your projectorStep 6: Find the right material to trace withStep 7: Go for it!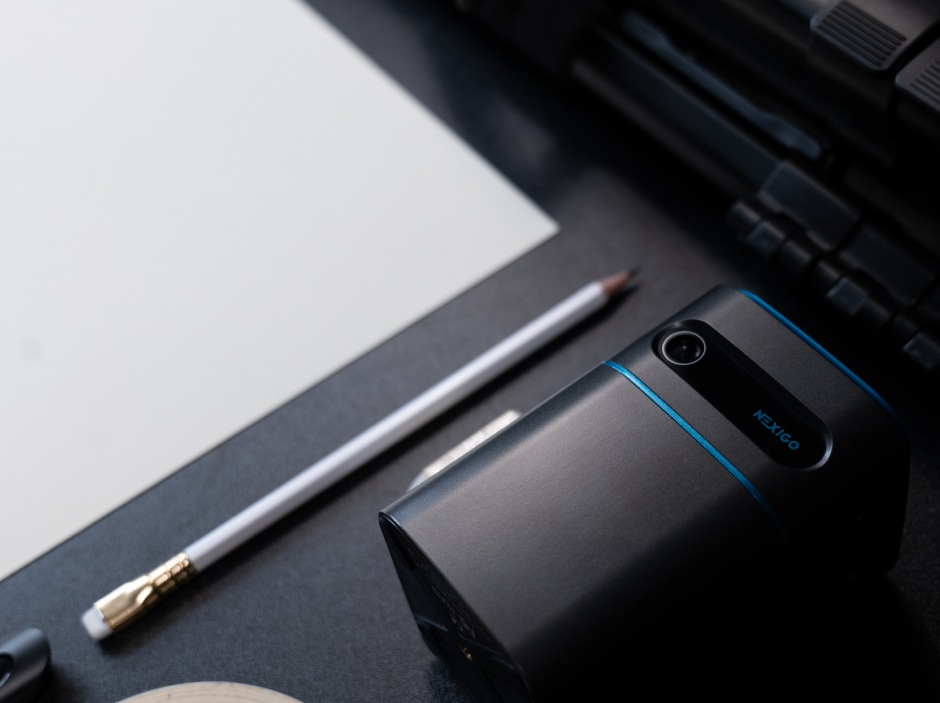
How To Set Up a Projector in Your Art Studio For Tracing: 7 Easy Steps
Amber Stefanson | Nov 17, 2023
Projectors can be great tools for getting started on an art piece, significantly speeding up the drawing process. Yet, with so few projectors designed to fit the needs of artists, it can be difficult knowing where to start.
In this article, I’ll cover all the basics:
- How to choose a projector
- How to set up your projector for tracing
- Tips to making sure the process goes smoothly
But before we get started, I need to address the elephant in the room. The big question: is it cheating to use a projector?
Every time you look up anything to do with using a projector in your artistic process, you’ll find blogs and forums with arguments from both sides. Most likely you found some on your way here. No matter where you go, this question seems to cloak projectors like a miasma.
Is it cheating to use a projector for art?
Every artist uses tools, and it’s up to you which tools you want to use. By definition, you don’t need to freehand everything to be a “Real Artist” — you simply need to create art. Yet some artists consider using a projector in the early stages of a piece of artwork to be cheating.
In fact, some consider an artist’s use of many modern tools to be cheating, including lightbox tracing, reference images, and even digital art in general. The more digital the tool, the more highly contested it seems to be.
Many great artists have used projectors
However, artists have always used the latest technology to expand their artistic toolset. As early as the 1500s, artists were using Camera Obscura, an early form of projection thought to have been used by old masters like da Vinci, Rembrandt, and Vermeer.

1755 Camera Obscura illustration by James Ayscough (Credit: The British Museum, CC BY-NC-SA 4.0)

Camera Obscuras project an upside down replica of a view into a dark room (Credit: redditor u/camdoodlebop)
When it comes to contemporary art projectors, instructor Lee Hammond argues that there’s no promise of quality in the hands of an unskilled artist.
Hammond’s beginning art students were unable to effectively trace an image using a projector. Without drawing skills or background knowledge in composition, they didn't know which details to highlight and which to leave out.
The tools don’t make the artist
All of this to say, your skill and identity as an artist far outweigh the importance of which tools you use. The tools you decide to use don’t determine whether you’re making “Real Art", and other artists don’t get to decide that either.
Ultimately, each artist must decide for themself how they approach the creative process. If you want to use an art projector, then go for it! There are several advantages of using a projector, especially for professional artists.
The benefits of using an art projector
In the hands of a skilled artist, an art projector can help speed up the processes of getting started on an art piece. In fact, using a projector can help in many ways, including…
- Speeding up commissions, especially portraits where the finished piece needs to be highly accurate
- Quickly combining elements from multiple compositions
- Upscaling an image or sketch to a larger size
- Making it easier to draw repeating patterns
If you’re ready to reap the benefits of using an art projector in the early stages of your creative process, read on and I’ll go over all the supplies you need to get started.
What You’ll Need

Projector
Digital mini-projectors are the easiest to use, but any projector is fine for tracing
Drawing Surface
Paper, canvas, hardboard, or even a wall will do
Drawing Utensil
Any sketching utensil that works well with your medium
Tape (optional)
If you’re tracing onto paper, you’ll need low-tack tape to keep it in place. For canvas, an easel that can go perfectly upright is preferred.
Tripod (optional)
This will help keep your image steady. Using a convertible overhead tripod will make it possible to project from a wider variety of angles.
If you don’t use a tripod, you will only safely be able to trace onto vertical surfaces.
USB Drive (optional)
You’ll need a USB Drive to get your reference image onto your projector. This one supports both USB-A and USB-C, making it perfect for both Mac and Windows users.
Wireless casting and HDMI devices are fine alternatives if you don’t have a USB drive.
Reference Image
In this article, I’ll be using this reference image from Garreth Paul on Unsplash to illustrate the setup process.
Which kind of projector should I get?
There are two common types of projectors used for art projection: opaque projectors and digital projectors. Which one you should choose mostly depends upon whether you want to be able to use digital references from your phone or tablet.
Digital vs. Opaque Projectors
Opaque projectors are a kind of projector that takes a small drawing or photograph and projects it onto a larger surface area. The opaque projectors marketed towards artists are essentially compact versions of overhead classroom projectors. The industry leader in opaque projectors is the Artograph Prism.
Digital projectors, on the other hand, take digital files and reproduce them using LEDs, lasers, or spinning color wheels. There is a wide variety of digital projectors and no real industry leader for art projection.

Opaque projector

Digital projector
When choosing between these two projector types, it’s important to consider your current creative process. Do you use physical drawings, digital references, or a mix of both?
Would you rather use a digital projector and need to digitize all physical drawings? Or would you rather use an opaque projector and need to print out all digital references? Whichever you pick, there are trade-offs when it comes to cost, corrective settings, and ease of use.

Ultimately, opaque projectors are a simpler solution when all you need to do is upscale physical drawings and sketches.
If you want versatility in your studio, opt for a digital projector — they’re great for reproducing digital images and digitized sketches at any scale.
How to choose a digital projector
Many of the projectors marketed towards artists are heavily simplified, lacking important features like USB ports and keystone correction that make them more functional. Meanwhile, media projectors that have all the bells and whistles are often too large, expensive, and finicky to justify using them for an art piece.
My goal is to help you strike a balance and find a projector that is affordable, lightweight, and easy to use. Below are some features you should look out for when choosing a digital projector for tracing.
Shop for these important features
Wireless design
Wireless projectors with rechargeable batteries are the most convenient to use because you don’t need to be near an outlet to use them. They also tend to be small, lightweight, and easy to store.
Keystone correction
Keystone correction is a feature that enables you to digitally straighten out an image if it’s crooked.
Keystone comes in a few flavors: automatic, vertical, 4-point, and 8-point.

Automatic is the easiest while 8-point is the most precise. However, any kind of keystone correction will be helpful while making art.
Throw ratio and screen size
Keep an eye on the recommended screen size and the distance required to make a screen that size.
If you’ll routinely be working on surfaces smaller than 24” x 36”, you’ll need a long throw projector. Look for a throw ratio between 1:1 and 3:1.
If you’re planning to work on large-scale work like murals, consider a short throw projector that won’t need to be so far away from the wall to cast a full-size projection. Look for a throw ratio under 0.6:1.
For in-between sizes, throw ratio is not as important.
If you need help converting diagonal screen sizes to measurements for your drawing surface, try this calculator.
Tripod threads
If you plan to use a tripod with your projector, make sure that it has a standard ¼” tripod thread.
Universal connectivity
If you want many options for displaying your reference image, look for projectors with all of the following.
- AirPlay
- Screen Mirroring
- Wi-Fi
- Bluetooth
- USB ports
- HDMI ports
Conversely, there are projector features that are prominently advertised but won’t have a strong impact on your tracing experience. Save some money by passing on these features.
Pass on these expensive features
High ANSI lumens
As long as you trace in a dark or dimly lit room, bright projectors with high ANSI Lumens are unnecessary. Going with a dimmer projector will save you a lot of money.
High resolution
Unless you’re tracing many fine details on a very large surface, resolution is unimportant. Your eyes will fill in any missing detail. Opt for 480p or 720p over 1080p or 4K.
Licensed operating systems
Popular operating systems like Roku and GoogleTV cost manufacturers extra money to license for their projectors, and that cost is passed on to customers. Save some money by choosing a projector with an open-source OS like webOS.
My personal favorite, and the projector I’ll be using in my demo, is the NexiGo PJ01. It’s completely wireless and roughly the size of a soda can.
It comes with automatic keystone correction, universal compatibility, and a touchscreen interface — meaning you won’t need to worry about losing the remote control.

The PJ01 has touchscreen controls on top and a focus dial on the side.

There’s also a tripod thread on the bottom for easy mounting.
Note that this is a medium/long throw projector. It’s versatile enough for small pieces as well as some larger work.
However for mural work, I recommend something with a shorter throw, like this one from Kodak. It has many of the same features, but requires less than half the distance to cast the same size screen as the NexiGo PJ01.
Now that you know what equipment you need, let’s get into how to display your reference image and start the tracing process.
Step 1: Upload your image onto your projector
First, you need to figure out how to upload images onto your projector. There are three ways to go about this, but your projector might not be compatible with all of them.
Ways to upload your photo
Casting wirelessly using a smart device
Prefer to keep things simple? Avoid buying additional equipment by choosing a projector that can receive screen sharing signal from your device — whether your device requires AirPlay (Apple), Miracast (Windows), or Chromecast (Android and Chrome).
The NexiGo PJ01 features AirPlay for Apple users, Miracast for Windows users, and eShare app for other devices.
Using a USB drive
Use your computer to upload your reference image onto a USB-A thumbdrive.
This is the most foolproof way of getting an image onto your projector. Not every projector will be compatible with wireless casting from your smart device type, but every projector should come with a USB-A port.
Using an HDMI device
Most digital projectors also come with HDMI ports, so you can easily use any type of HDMI device you already have to transfer an image.
- Connect a computer for easy access to any reference image.
- Connect a TV Stick to sketch a scene from a movie or tv show.
- Connect a gaming console to sketch a screenshot from a video game.
If you decide to use a USB drive, make sure that you upload images in a format that your projector can read. Follow the steps below to correctly upload your reference images.
How to upload to USB
1. Plug your USB drive into your computer.
2. Transfer all reference images onto your USB drive and store them no more than one folder deep.
3. Make sure that all images are in a widely compatible image format, such as .png or .jpeg. Less common formats like .svg and .heic may not display properly on all projectors.
4. Eject your USB drive.
5. Plug your USB drive into your projector.
6. Navigate to the folder system of your projector to find your reference images. Usually, you can find the folder system on the Home Page or in the Settings Menu.
Step 2: Secure your drawing surface
Next, determine your drawing surface and secure it into place so that it doesn’t move around while you’re in the middle of tracing.
I’m going to be tracing onto some paper, so I’m taping it down onto my table with some thin artist’s tape so that it stays in place while I trace.

Taping my paper to a tabletop
If you’re tracing onto a different drawing surface, you may need to find another way of securing it in place.
Recommendations based on drawing surface
Paper
Tape your paper to a table or wall. If you tape it to the wall, make sure to pick up a roll of tape at least 1” thick so that it doesn’t fall off. Wall mounting is recommended when using opaque projectors.
Canvas
Hang your canvas on the wall or place it on an easel. If you place it on an easel, ensure that your canvas is perfectly vertical, otherwise your projection will turn out distorted.
Panel or hardboard
Tape your flat panel to a table so that it doesn’t move around. You can also mount your panel on an easel, but make sure that it’s perfectly vertical to avoid distortion. Easels are recommended when using opaque projectors.
Wall
If you’re planning to trace for a mural, now is a good time to take measurements and tape an outline around your working area. This will help you perform keystone correction and keep your projection lined up between sessions.
Step 3: Mount your projector
Now that your drawing surface is secured, it’s time to set up your projector. Determine how to mount your projector based on the type of projection you need.
Recommendations based on the projection type
Vertical Projection (Digital)
You need a vertical projection if you’re projecting straight forward onto a vertical surface such as a wall or easel-mounted canvas.
Mount your projection to an upright tripod, or set it on any horizontal surface if you don’t have a tripod. You may need to move your furniture around to get the right projection size if you aren’t using a tripod.
Horizontal Projection (Digital)
You need a horizontal projection if you’re projecting downward onto a horizontal surface such as a floor or tabletop.
Mount your projector to an overhead tripod. It is not recommended to project horizontally if you don’t have a tripod.
Opaque Projection
If you opt to use an opaque projector, place your projector onto a table and point it towards your drawing surface.
Also figure out how far your projector needs to be from your drawing surface so that it fills the whole drawing area. Keep your projector further away for a bigger image or closer for a smaller image.
I’m going to be projecting down onto a horizontal tabletop, so I’m mounting my PJ01 on an overhead tripod. It only needs to be about 2 feet above the table to fill the entire width of my 11x14 paper.

Projector mounted to an overhead tripod
Step 4: Make sure it’s dark
Before you finish setting up your projector, turn off the lights. This will help you see all the fine details in your image which could be washed out by bright lighting.
Don’t worry about being able to see; your projector will provide ample light for you to be able to see what you’re doing.

You can see the image much better when the lights are off
Step 5: Calibrate your projector
Before you make any adjustments, carefully position your projector so that it’s as close to perfect as possible. The fewer digital adjustments you need to make, the better. If there’s too much to fix, you’ll spend way too long stressing yourself out trying to make it perfect.
Keystone correction
Once everything’s in place, turn your projector on and navigate to Keystone Correction. Usually, you can find it in Settings Menu > Display. Occasionally you can find it on a dial on the side of your projector. (If you’re using the NexiGo PJ01, you can skip this step entirely, since it features automatic keystone correction!)
Follow the on-screen instructions, or adjust the keystone dial until the corners of the projection align with the corners of your drawing surface.
Focus
If your reference image is blurry, you must also adjust the focus. Typically, you’ll also find focus in Settings Menu > Display or on a dial on the side of your projector (this is where it is on the PJ01).
Follow the on-screen instructions, or adjust the focus until you can see all the details of your reference image clearly, paying extra attention to the corners.

Out of focus

In focus
Step 6: Find the right material to trace with

Image credit: Met Museum
Finally, you’ll need to find the right utensil to trace with. If you’re used to tracing with very faint pencil marks that are easy to erase later, you’ll need to find an alternate solution when tracing with a projector.
It will be more difficult to see faint marks under the light of a projector, so be sure to pick a darker sketching utensil. These are a few recommendations based on the medium you’re planning to use for your finished piece.
Recommendations based on medium
Oil paint
Charcoal or thinned paint
Watercolor and Gouache
A watercolor pencil in a darker color such as Payne's Grey or burnt umber
Acrylic Paint
Graphite, charcoal, or paint
Ink
Softer graphite that can make dark marks without creating indentations in your paper
Step 7: Go for it!

That’s it! Now that your projector is all set up, you can go ahead and start tracing. Here are a few tips to make sure the process goes smoothly:
- Don’t trace every detail. Focus on larger shapes and major reference points.
- Your hand and tracing utensil will block part of the projection. To trace certain sections, you may need to move around and trace from different angles.
- If your projection doesn’t fill your whole surface, make marks around the edge of your reference image so that you can easily line up the projection if you take a break.
Thanks for reading, and good luck in your artistic endeavors! Check out some more of our articles for more interesting ways to use your projector.
Like what we do? Stay tuned for more.
Whether you work at home or in the office, NexiGo provides a wide range of quality and affordable technology to elevate your daily life. Our products encompass everything from webcams and portable monitors to projectors and gaming accessories.
Articles we think you'll love